Showing posts with label CoffeeShop Action Flashback. Show all posts
Thursday, July 7
CoffeeShop "3x4" PhotoMaker H" Photoshop/PSE Storyboard Action!
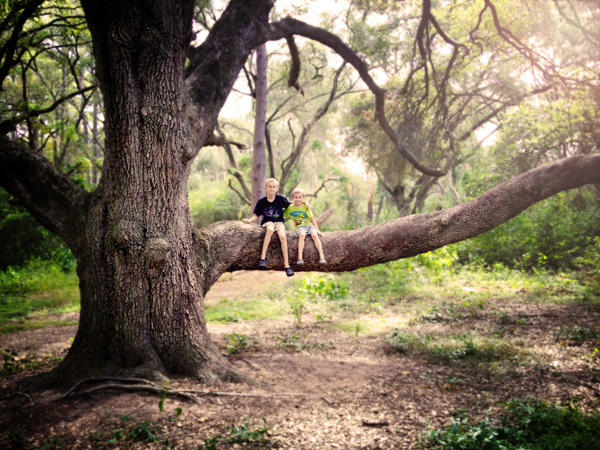
Today I have a brand new Photoshop/PSE action that was actually requested by one of my readers. This action allows you to add/sharpen two 3x4 horizontal images to one 4x6 print. You can also use this action to create a simple two-image web board.
I will make and post a second action that allows you to add two vertical images to one 4x6 print by next week.
NOTES ON USING THIS ACTION!
1. You have to have everything closed in Photoshop/PSE before starting this action. If you don't it won't run correctly.
2. Add the top image first, then the bottom image. The action will place each image on the 4x6 storyboard, and you can adjust the placement to taste. If you can't see the drag bars when Free-Transforming the image, Ctrl-0 (zero) to zoom out and/or drag the image display pane out so you can see the sides of the image.
3. Sharpen the image to taste at the end. Then save and print or post on the web!
I want to thank Jill Wellington (Etsy Shop, Facebook, Blog, YouTube Videos, Pixabay) and Sam of Bloom Photographer for allowing me to use their beautiful images on my example above.
Download the CoffeeShop "3x4 PhotoMaker H" Photoshop/PSE Action.
Do you want to download thousands of professional CoffeeShop PSE/Photoshop actions (including exclusive ones not found anywhere for free), textures/overlays, scrapbooking papers, clip art/design elements, photo storyboards and frames, and Lightroom presets from this site in one convenient zipped file AND help support this one-woman blog?
Just click here for my CoffeeShop Mega Download Pack!
Friday, December 11
CoffeeShop "Snowy Christmas Portrait" Photoshop Tutorial and Santa Hat Overlay!
Even though the temperatures the last week have been in the 70's (what winter?) I have been having so much fun creating portraits with fake snow. I know many of you also want to play in the "snow", so today I have a new tutorial showing you how I create a beautiful snowy Christmas portrait.
You can download the fun Santa hat I used in this tutorial at the bottom of this post. I cropped it out of this image. I love the refine tool in Photoshop, it made selecting this hat so easy.
To follow along with this tutorial go grab my "Winter Dreams Extreme" action and "Artistic Cracked Glass" texture. Also make sure you pick up the Shadowhouse Creations Snow Overlays. I have included one snow overlay with the Winter Dreams action, but I really like the Shadowhouse snow overlays as they have everything from a light snow to a blizzard. :-)
I used my dear son's image for this tutorial. I still can't believe my baby is eight...
CoffeeShop "Snowy Christmas Portrait" Tutorial for Photoshop and PSE:
This is a SOOC photo I took yesterday. As you can tell, it is still green outside. I used a little photographer trick to get his skin to glow so nicely.
I ran the "Winter Dreams Extreme" action. For full instructions on using this action please visit this post.
I turned on the bottom "Remove Greens/Yellows" layer, clicked to select its layer mask, and used a black brush to paint that layer off my boy. I just want to desaturate the color on the background. I also reduced the Fill of that layer to 82%.
I noticed that his green eyes looked blue, so I clicked on the "Winter Colors" layer mask and used a soft black 50% brush to remove some of that effect off his eyes.
Then I added the santa hat (you can download it on the bottom of this post). I felt that the hat was too bright and colorful where I had placed it, so I dragged it under the "Remove Greens/Yellows" layer.
I had painted on the layer mask to remove the "Remove Greens/Yellows" layer from his body and head, but now that I added the hat I needed to go back to the layer mask and paint that effect back on his hat.
If you want to see a red color where you are painting on the layer mask as seen on my screenshot, click on the layer mask while holding Shift, Alt/Option. Repeat to remove it.
I used a white soft brush to add the "Remove Greens/Yellows" effect back to the hat.
Now the hat is not as bright.
It is time to add the snow! I dragged the Shadowhouse Snow Overlay 11 on top of the image and put it in Screen blending mode.
I added a layer mask and used a black brush to paint the snow off his face and neck.
I decided to also add one of my favorite textures, Cracked Glass. I put the texture on top in Soft Light blended mode, added a layer mask, and removed it off his face and neck.
I think the image has too much contrast now, but I will fix that.
I clicked on the "Winter Boost" layer and lowered the opacity from 50% to 12%. I really love this edit now.
I hope you enjoy creating your own snowy Santa images and I would love for you to share them on my Facebook page.
Download the CoffeeShop Santa Hat overlay here.
Do you want to download thousands of professional CoffeeShop PSE/Photoshop actions (including exclusive ones not found anywhere for free), textures/overlays, scrapbooking papers, clip art/design elements, photo storyboards and frames, and Lightroom presets from this site in one convenient zipped file AND help support this one-woman blog?
Just click here for my CoffeeShop Mega Download Pack!

Wednesday, May 6
CoffeeShop "Starburst" Overlay Pack and Tutorial for Photoshop/PSE!
I am really excited to post this free Sunburst overlay pack and Photoshop/PSE tutorial today. As you might know, the starburst/lens flare filter that comes with Photoshop/PSE is not incredibly realistic. I went looking for a tutorial to create my own and I found this excellent YouTube video that walked me through creating my own set.
It took a bit of time but I had so much fun and ended up designing five different versions to share with you today! I also wanted to post a tutorial on how I would combine one of my actions and these overlays to create an artistic edit.
CoffeeShop Starburst Overlay Photoshop/PSE Tutorial:
I am using this stunning image from Jill Wellington (Facebook, Blog, Free Photoshop Videos) for this tutorial. It is already perfect (Jill is such a talented photography and artist), but it is fun to create "artistic" versions of your favorite images for displaying on your walls or your website.
You don't have to combine actions and overlays, I just wanted to show you one way I would edit this image using several fun tools.
Run Action: I ran one of my of my favorite actions called "Buttercream Luxe" on the image. This screenshot shows the image after the action finishes running with no adjustments. The beauty of using my actions is you can customize them to get your own personal edit and have the enhancement as dramatic or subtle as you wish.
After Action Adjustments: I turned on the Define layer and reduced it to 15%. Then I added some rosy glow to her cheeks using the "Rosy Lips and Cheeks" layer.
After looking at this version, I decided the background was too green and I wanted to add some blue to the shadows. There are several ways to do this and I used Curves in this example, but PS/PSE users can also use Levels with equal results.
I painted on the layer mask with a soft black brush to remove most of the blue Curves layer from the horse and the girl.
Photoshop Users: Add a Curves adjustment layer under "Rosy Lips" and select Blue. Then move the lower left point of the curve straight up until you are happy with the effect.
Add Starburst Overlay: Open up your Starburst Overlay (in this case I used CS Starburst Overlay #4) and drag it on top of your image under the Butter Cream layer and set it to Screen blending mode. Resize the overlay and drag it to an area of sky where light would be shining through so that it looks realistic.
In this edit I put the Starburst overlay at 76% and slightly Gaussian blurred it. I used a black soft brush on the layer mask to remove the starburst light from her face and hair.
Mouseover the image below to see the "before".
I love this edit!!! These starburst overlays look so much more realistic than the filters that come with Photoshop/PSE and they are so easy to use. I hope you enjoy using them on your image image and I would LOVE to see your before and afters on my Facebook page!!!
Download the CoffeeShop "Starburst Overlay set".
Do you want to download my favorite CoffeeShop PSE/Photoshop Actions and Lightroom Presets or Design Elements in one convenient zipped file AND help support this blog? Just click here for my action pack or here for a download of some of my most popular design elements, storyboards, and textures.
For complete info on installing all of my actions, click here.
Facebook | Pinterest | Twitter
Thursday, July 31
CoffeeShop "Cherry" Digital Paper Set!
Today I have a brand new digital "Cherry" paper pack inspired by the pounds and pounds of cherries my family has been eating this summer. If only we could grow cherry trees in Texas… I used a beautiful cherry graphic from The Graphic Fairy.
These papers can be used for website/blog backgrounds, cards, Facebook covers, headers, frames, etc. Have fun playing with them and don't forget to post your creations over at my Facebook page. I love to see what you have done with my freebies.
Download the CoffeeShop "Cherry" paper pack. You can also download it here.
Do you want to download my favorite CoffeeShop PSE/Photoshop Actions and Lightroom Presets or Design Elements in one convenient zipped file AND help support this blog? Just click here for my action pack or here for a download of some of my most popular design elements, storyboards, and textures.
Monday, September 23
CoffeeShop Actions Flashback: Combining "Once Upon a Time" with "Sun Bliss" to Make Magic!
Many of you combine my actions to get really original, beautiful results. Today I wanted to revisit two of my older favorite actions, Once Upon a Time and Sun Kissed. I am going to show you how I used them both on an image and some nifty tricks to customize both actions.
This is a low-resolution, grainy camera phone photo I took a few days ago. Pretty standard snapshot, but I think this has potential. I didn't have control of my depth-of-field so I decided to add some post-processing.
I ran the Once Upon a Time action on this image. When the selection for the area that would not be blurred came up, I adjusted it so that it would not affect my image by collapsing it down to a pixel. That way everything would be blurred. After the action finished I filled the Blur layer mask with white and used a soft black brush at 100% opacity to paint off the blur around the boys to add depth-of-field (see image below to see what I masked out). This is more accurate then simply adjusting the blur setting in the action as I wanted to keep the area behind the boys blurred. Here is my new version of Once Upon a Time that allows you to add custom blur.
I also used a soft white low opacity brush to paint in part of the tree bark in the Dodge/Burn layer to add some lightness.
If you press the "\" key you can see the area you have masked off from the Blur layer. I tried to remove blur from the parts of the image that would be in the same distance from my camera to add the depth.
Now I want to add some light so I ran my Sun Kissed action on the flattened image. I don't like the light circles on the bottom left part of the image and I think the image is too light. I think that the Photoshop lens flare effect can look very fake, but I have a simple fix (here is a newer version of Sun Kissed!).
Turn off the lens flare layer (or delete it). Make a new layer above the lens flare layer and fill it with back. Run the same Lens Flare filter on the black layer. If you have Photoshop, just go to Filter and click on the top selection, it will be the lens flare setting you adjusted in the action. Put this layer in Screen and set the opacity to taste, then use a black brush to paint out the flare effect you don't want (in my case, the light in the bottom left). Check out the new version of Sun Kissed here.
I turned off the haze and adjusted the contrast and now I have an image that makes me happy. It went from "blah" to magical! It might be a bit grainy, but this would make a great small print for my wall.
Mouse over to see the before.

I hope you enjoyed this little tutorial!
Do you want to download my favorite CoffeeShop Actions or Design Elements in one convenient zipped file AND help support this blog? Just click here for my action pack or here for a download of some of my most popular design elements, storyboards, and textures.
For complete info on installing all of my actions, click here.
Monday, June 24
CoffeeShop Action Flashback: CoffeeShop Reader Version!
I love seeing your before/afters using my actions/presets and tutorials that you post on my Facebook page. Please keep on posting them! I want to highlight some of them on my blog to show off my talented readers.
Today I wanted to show a beautiful before/after sent to me by Tamara of BrandyShots.
Tamara used CoffeeShop Portrait ToolBox and Dandelion Wine to edit this stunning image. I adore both shots, but I do love the colors in the "after" version, I think she really "pops". Those freckles and eyelashes are killing me. I love that this is not a normal portrait (eyes to the camera), yet still captures a beautiful moment.
Do you want to download my favorite CoffeeShop Actions or Design Elements in one convenient zipped file AND help support this blog? Just click here for my action pack or here for a download of some of my most popular design elements, storyboards, and textures.
For complete info on installing all of my actions, click here.
Saturday, March 2
CoffeeShop Action Flashback: Instant ColorBar!
Today I wanted to revisit one of my favorite actions, The CoffeeShop Instant ColorBar.
I spend a lot of time working on the actions I post on this blog (they seem almost like my little babies) and I can't tell you how excited I am to see what you do with them. I love when you post your before/afters or just afters on my Facebook page because I get so inspired by how you use them in your work.
Case in point, Kristin has found the most clever use for the CoffeeShop Instant ColorBar action. She posted this adorable image last week on my Facebook page.
I have never seen anyone do this with the ColorBar action and I think it is so incredibly clever. Kristin has been doing it every month since her daughter was born. I think this is a brilliant way to document your baby's first year, and wouldn't this be an amazing storyboard printed on a large canvas? Imagine giving this to the proud grandparents, or making one for yourself. I wish I had thought of this years ago when I had small ones.
Isn't this one darling with the spit bubbles? And that hat.... And those eyes.... I have baby envy right now. Sigh...
Kristin, thank you so much for sharing these beautiful photos and your creative genius!
I love when readers use my actions and design elements and post their images on my Facebook page. I absolutely love blogging here and creating these freebies, and seeing how you use them is such an honor and an inspiration. I am always looking for ways to inspire my readers, so I might end up featuring your work on my blog if you are interested!
Happy Weekend!
Do you want to download my favorite CoffeeShop Actions or Design Elements in one convenient zipped file AND help support this blog? Just click here for my action pack or here for a download of some of my most popular design elements, storyboards, and textures.
For complete info on installing all of my actions, click here.
Sunday, December 23
Tutorial: Creating Custom Glitter Text in Photoshop/PSE!
I am going to take the next few days off from blogging to spend time with my family for Christmas. I hope everyone has a wonderful holiday with their loved ones!
Today I wanted to show you how to make your own custom glitter text. You can also use this tutorial to add any type of texture/digital paper to text. And you aren't limited to using only digital papers, you can also add patterns.
1. Download the CoffeeShop Glitter Papers to follow along with this tutorial. Make a new document with a white background. I made this one around 1200 px wide. Then pick your favorite bold text (I used Cry Kitty in this tutorial) and type your text.
2. Open the gold glitter paper you just downloaded.
3. Click on V, and drag the gold glitter paper over the text layer. (You can also add the glitter Photoshop pattern, but that is another tutorial.) Ctrl-T to resize the texture to fit over your text.
4. Now you will need to make the text into a clipping mask. Click to select the gold glitter layer and then right click and select Create Clipping Mask. You can also alt (option)-dangle the mouse between the layers and then click to create the clipping mask.
5. Now you have lovely glitter text!
6. Next I will add a drop shadow effect. Make sure the text layer is selected and go to Layer, Layer Style, Drop Shadow. Or double-click on the text layer to get the style pane and select Drop Shadow to the left.
7. Adjust the setting I have circled to taste.
8. Now you can save your text as a png file with a transparent background. Turn off the bottom layer with the white background and click on the little drop-down menubar on the Layers pane and select Merge Visible. Merge Visible keeps the background transparent. Do not flatten the image unless you want to add the text to a white background! Save the text as a png file or drag and drop it on your design.
9. Here is a sample where I added the glitter text. This text would be lovely on headers, facebook headers, blog post headings, etc. Have fun!
Do you want to download my favorite CoffeeShop Actions or Design Elements in one convenient zipped file AND help support this blog? Just click here for my action pack or here for a download of some of my most popular design elements, storyboards, and textures.
Sunday, November 18
CoffeeShop Storybook Vintage Flashback and Tutorial!
I love the CoffeeShop Storybook Vintage action. Today I am going to do an edit with this action and also use one of my textures.
CoffeeShop Storybook Vintage Texture Tutorial:
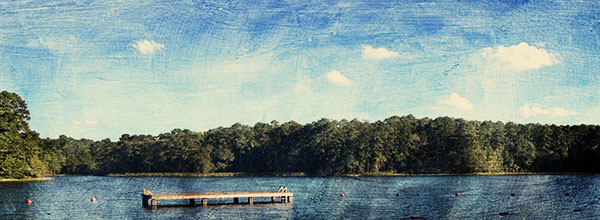
1. I snapped this shot with my iPhone at Huntsville State Park this November on our camping trip. Huntsville is gorgeous and I love this park. I wanted to use this lake scene for my Facebook cover and decided to add a texture.
2. I cropped the image but didn't resize to the 851x315 Facebook cover size. I will do that after the edit.
3. First I added the CoffeeShop Painting Texture 2. These painting textures are some of my favorite textures I have posted on this blog. They can be used on anything. As you can see the texture is larger than the image, but I just moved and typed Ctrl-T to place it where I wanted on the image. I put this in overlay blending mode.
4. I typed Ctrl-J to make a copy of that texture layer and kept it in overlay blending mode.
5. I wanted to add a vintage tint so I flattened the image and ran the CoffeeShop Storybook Vintage action. The only adjustment I made to the action was bring the Vintage Color Tint layer up to 64% from 50%.

Here is the final edit. I am really pleased with it. Please mouse over to see the before. Both the action and textures are free downloads on my blog, and they are also included in my download sets.
Do you want to download my favorite CoffeeShop Actions or Design Elements in one convenient zipped file AND help support this blog? Just click here for my action pack or here for a download of some of my most popular design elements, storyboards, and textures.
For complete info on installing all of my actions, click here.
Subscribe to:
Posts (Atom)