Saturday, January 30

Hill Country Musing


I am a homebody. I love where we live and I enjoy just hanging around with the boys in and out of the house. We have everything our heart's desire; fields to run in, old barns to explore, trees to climb, a pond to fish, and a comfortable lived-in house to rest in when it is too cold, hot, or dark to be outside.

However, sometimes I need to get away...

Thursday, January 28

CoffeeShop Soft Autumn Glow PS/PSE Action and Tutorial!


I am excited to offer a new action and tutorial; CoffeeShop Soft Autumn Glow. This action adds a soft glow and contrast boost, with a subtle yellowish tint and optional vignette.  I love using this effect on landscapes and flowers, but you can also use it on portraits and weeds (see below!).


For those of you that are interested in seeing what the action does, step-by-step, I included an UnWrapped tutorial at the bottom of this post. :-)

Every layer is adjustable. You can turn up the Color Mute layer's opacity to mute the color. The Vignette layer can be turned off or you can adjust the opacity of that layer (put in Overlay Blending mode for a more dramatic vignette effect).

The Glow layer can be turned off or its opacity can be adjusted. You can also add more glow during the action run (the Gaussian blur adjustment), but the setting as programmed should work for most of your images since you can dial it down after the action finishes. However, if you are starting with a very high resolution image you might want to boost it up to 8 or 10 (it is set at 5) to get more dramatic glow.

Download the free CoffeeShop Soft Autumn Glow PS/PSE Action HERE!

CoffeeShop Soft Autumn Glow Action UnWrapped Tutorial!

NOTE: This tutorial will only work in Photoshop. You can't edit Advanced Blending in PSE... But don't worry, PSE users can access this hidden feature by running the action!

1. Make 3 duplicates of your background layer. Ctrl-J three times.
2. Double click on the top layer. In the box that pops up, put the blending mode into Overlay, 100%. Then go to the Advanced Blending in the middle and uncheck the B (Blue) in the RGB channels. Name this layer Contrast.
3. Double click on the next layer down. In the box that pops up, put the blending mode into Screen, 50%. Then go to the Advanced Blending in the middle and uncheck the B (Blue) in the RGB channels. Name this layer Golden Tones.
4. Click to select the next layer down (the copy just above the background). Go to Filter, Blur, Gaussian Blur and use a setting of 5 for most images. Then adjust the opacity of that layer to taste and name it Glow.
5. Color Mute Layer: If you find your colors too vivid, add a Black to White Gradient Map Adjustment layer on top of everything and set the opacity to taste.
6. Vignette: Follow the CoffeeShop Burn tutorial to add a vignette.

Do you want to download thousands of professional CoffeeShop PSE/Photoshop actions (including exclusive ones not found anywhere for free), textures/overlays, scrapbooking papers, clip art/design elements, photo storyboards and frames, and Lightroom presets from this site in one convenient zipped file AND help support this one-woman blog?

Just click here for my CoffeeShop Mega Download Pack!

Friday, January 22

Blogger UnWrapped: Adding a Top Button Menubar!


I get asked quite often how I put a top menubar with clickable buttons on my blog. I did a lot of reading and there are easy ways and there are difficult ways. I hope this is an easy way.

Tuesday, January 19

Keeping It Real, Or Putting My Money Where My Mouth Is

I decided I should put my money where my mouth is and actually follow my own advice. I preach about taking photos of your everyday life and surroundings, so I decided to take and post some photos of my gym...

Sunday, January 17

CoffeeShop 101: Cross-Processing with Levels!

If you have been following my CoffeeShop Editing 101 tutorials you have probably realized there are what seems to be a million different ways to get the same effect...

Tuesday, January 12

Time to pull out the camera!

You know something I regret? Not taking enough photos of the rooms of my house as a kid. Sure, I have a few shots with people in the rooms, but I would love to have photos of every room, including my bathroom. Who takes photos of their bathrooms you might ask? Well, you should...

Sunday, January 10

CoffeeShop Photo Corners and Frame Templates!


I am a bit obsessed with photo corners, especially the vintage ones in my grandparent's photo albums. I wanted to make some in Photoshop and found this great tutorial. I made a set of them in a few minutes (well, maybe an hour off and on, the kids were a bit annoyed I was on the computer and not waiting on them hand-and-foot).

They are really quite realistic and I love using them. I thought you might want to play with the tutorial; or if you are lazy, I made a set (and a few vintage layered frames with clipping masks) that you can download for free! I hope you enjoy your new photo corners. :-) You can open these like any other image in Photoshop and Photoshop Elements.

If you want to change the frame colors of photo template 1, you just double click on the color fill layer box (where it says "Change color frame HERE"). Then select your frame color of choice using the eye dropper. If you need help using clipping masks, check out my tutorial here.

Download the free CoffeeShop Photo Corners and Frame Templates HERE!


Do you want to download my favorite CoffeeShop PSE/Photoshop Actions and Lightroom Presets or Design Elements in one convenient zipped file AND help support this blog? Just click here for my action pack or here for a download of some of my most popular design elements, storyboards, and textures.

For complete info on installing all of my actions, click here.

Friday, January 8

A Woman Blogger To Watch?


Now, on a more personal note... Wow, I just found out I was listed as one of the top 101 "Women Bloggers to Watch" in We Magazine for Women!!! I am very honored and thrilled to be a part of that list, and excited to check out all of the other woman blogger on there. Thanks, my amazing blog readers. I have said it before but it needs to be said again, if you were not over here reading my usually boring but sometimes useful posts I wouldn't have this amazing creative outlet. :-) 

 Everyone is slowly recovering from our winter ick. If we are able to skip the secondary infections, we hope to get out of the house sometime this weekend, if only to go out for breakfast. Today I was so desperate to get out that I bundled the boys up, put them in the car, drove thought the library drive-through window to pick up some books I had requested(I LOVE my library) and then took a 1.5 hour driving tour of our area. We visited the beautiful area parks (it is in the 20's, but the car was warm and toasty) and even drove down mysterious (to us) country roads. We live outside of town, and many of the roads were twisty and slightly hilly, and we saw everything from small vintage trailer parks to 100+acre ranches with huge houses; one that even resembled the Overlook hotel from The Shining. Inside I was going "woooooow", but I tried to hide my awe and perhaps a tiny bit of jealousy ;-) from the boys, so I asked Duke if he would like vacuuming that huge house, not to mention that his toys would probably get lost in all that space! It was nice to get out, and going on a driving tour kept the boys out of the cold and from spreading their viruses, yet still allowed them to escape from the house for a short while.

Wednesday, January 6

March 2009 Edits DONE!


March 2009 edits finished.

Thanks for all of your kind words about our sick family. We are still sick, but I think I see a light at the end of the tunnel. My boys love the fact they are getting to watch Little Bear for hours a day because Mommy does not feel like reading and entertaining them all day. I feel like Bad Mommy, but I will get them back on a normal schedule when we are all well again. :-)

I was reading comments from yesterday's post, and I found this jewel from from Joanie...

Tuesday, January 5

A New Year Resolution I Want to Keep!


January 2009

February 2009

So I have two sicks little boys (we all have some type of flu that involves fever, cough, sore throat, etc.) so we all have been stuck inside. The highlight of my New Year was when Duke vomited hamburger pizza all over my husband's favorite recliner. Anyone know how to get that smell out of leather??? I had to pick undigested hamburger out of the washing machine after cleaning up and washing the towels. Yuck...

I never make New Year resolutions ...

Friday, January 1

Introducing Johnna's Tea Party PS/PSE Action and Tutorial!


I want to wish you a Happy New Year!!!

I am excited and honored to be presenting another one of Johnna's editing techniques today. If you loved 
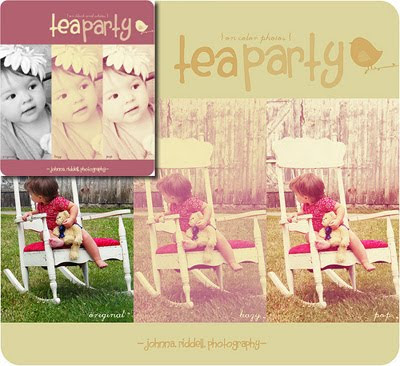
Johnna's Memories of Sunshine, you can now enjoy Johnna's Tea Party step-by-step tutorial and action. As before, the images above and the editing techniques are 100% Johnna's, I just put together the action. I am thrilled that Johnna is letting me post this on my blog.


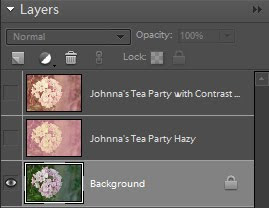
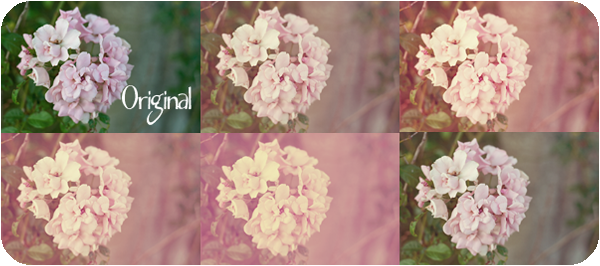
For simplicity, I made the action flatten all of the layers so you only have to adjust two layers, Johnna's Tea Party Hazy and/or Johnna's Tea Party with Contrast Boost, as seen in the layer pane image above. Simply turn on either or both layers and adjust the opacity to taste. You can have an extremely subtle or dramatic effect. I played around with both layer's opacity in the rose images below. You can also use 100% of the Hazy layer or 100% of the Boost layer.


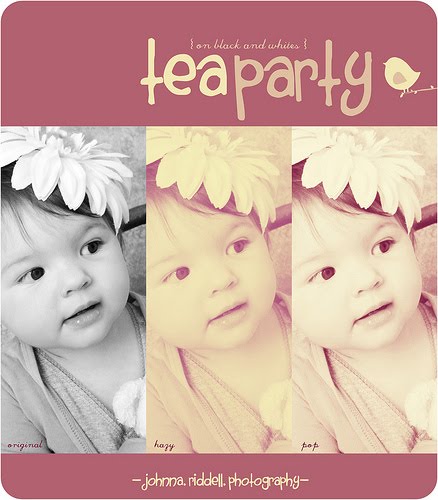
You can use this action on color or black and white images. You can also run it twice if you want (it automatically flattens your image before running the second time). If you want to see what the action is doing so quickly, I posted Johnna's step-by-step tutorial below.

Download the free Johnna's Tea Party PS/PSE Action HERE!

Johnna's Tea Party Action Unwrapped: Step-by-Step Tutorial!

If you want to see what is happening in the action or want to learn more photo-editing techniques, here are the detailed editing steps as written by Johnna on Flickr.

1) Layer, Adjustment, Hue and Saturation. Lower the Saturation to -21
2) Layer, New Fill Layer, Solid Color, Raspberry (530d24) on Screen Blending mode at 100%
3)Layer, New Fill Layer, Solid Color, Dark Navy (080638) on Exclusion Blending Mode at 100%
4)Layer, New Fill Layer, Solid Color, Butter (f6e7a9) on Multiply Blending Mode at 100%
5)Layer, New Fill Layer, Solid Color, Salmon Pink (d88792) on Soft Light Blending Mode at 100%
6)Layer, New Adjustment Layer, Levels (choose BLUES from pulldown menu), Output Levels 52 and 224
7)Layer, Adjustment Layer, Brightness and Contrast, Contrast +45
8)Layer, Adjustment, Hue and Saturation. Lower the Saturation to -18
9)Layer, New Fill Layer, Solid Color, Cream (f4ecd4) on Soft Light Blending Mode at 100%

That's the steps for Hazy Tea Party, to make it Pop there is just one more step

10) Duplicate Background Layer, move to the TOP of ALL the layers, set to Soft Light Blending Mode


Do you want to download thousands of professional CoffeeShop PSE/Photoshop actions (including exclusive ones not found anywhere for free), textures/overlays, scrapbooking papers, clip art/design elements, photo storyboards and frames, and Lightroom presets from this site in one convenient zipped file AND help support this one-woman blog?

Just click here for my CoffeeShop Mega Download Pack!