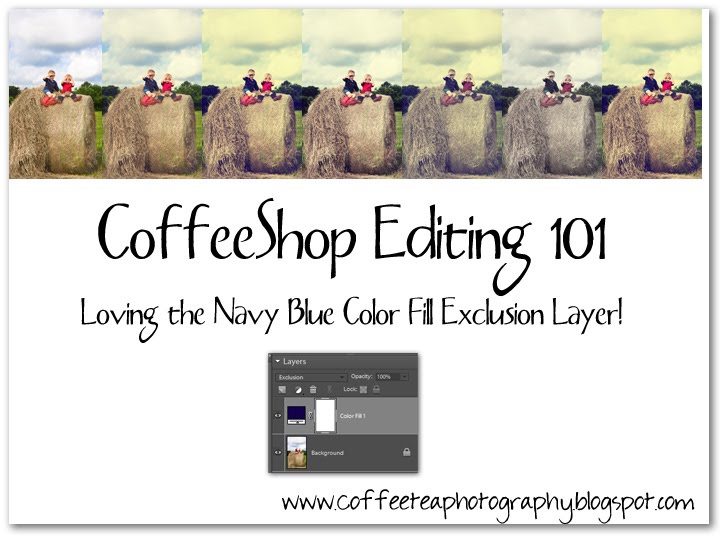
One very popular vintage technique... involves simply adding a navy blue Color Fill layer and putting that layer in Exclusion blending mode. For all of the images in the sample above, I used either one or two layers. One was the navy blue Color Fill layer, the other was a Black to White Gradient Map adjustment layer. This is a very easy technique that can give you stunning results.
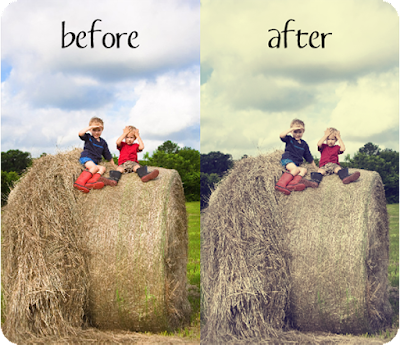
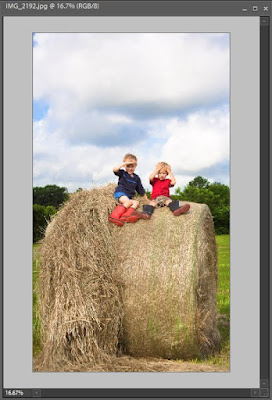 Open an image, any image.
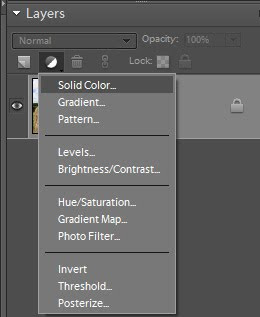 Add a Solid Color adjustment layer.
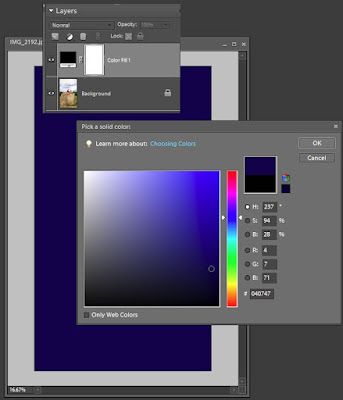 Pick a dark navy blue. I used hex#040747 for this tutorial, but you can pick your own custom color. You can also make changes later while looking at the image, so don't worry too much at this step of finding the perfect color.
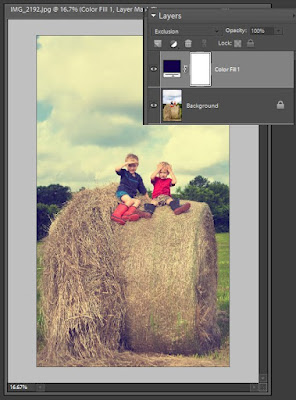 Now put the Color Fill layer in Exclusion blending mode and adjust the opacity.
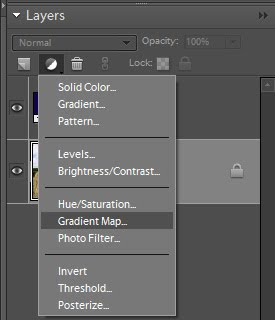 For a real "vintage" feel, you might find your colors are too bright (my reds and blues are so vivid). So simply click on the background layer and then add a Gradient Map Adjustment layer.
 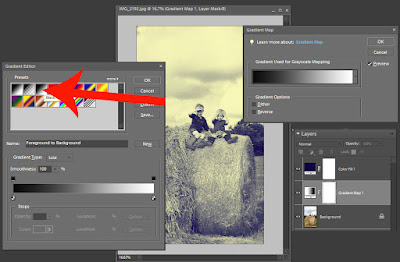 If you foreground is set to black and your background is set to white, it will automatically give you a black to white gradient map. Otherwise double click on the gradient and then click on the black to white square (as seen in the image above by the red arrow).
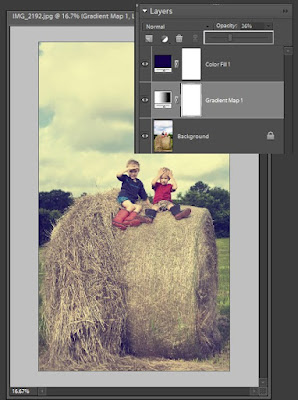 You can keep this in normal mode and lower the opacity to add back in some color.
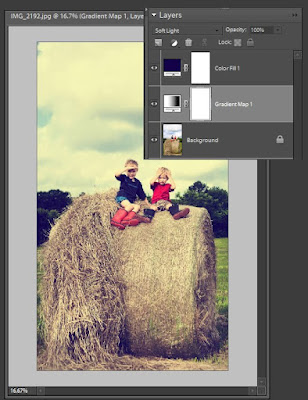 You can also put this layer in Overlay or Soft Light blending mode for a contrast boost instead of a color mute.
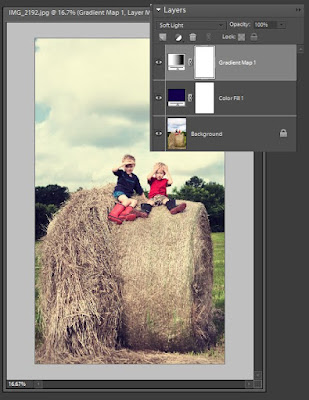 If you find the yellowish tint from the Navy Blue Color Fill layer too intense. you can drag the black to white gradient map adjustment layer up on top and put it in normal and adjust the opacity (to mute colors). Or you can put it in Overlay or Soft Light blending mode for muted colors AND a contrast boost.
These are all examples only, please feel free to play around! If you are unhappy with your tint, just double click on the blue part of the Color Fill layer and adjust the color on the fly. As you move the color picker around the colored area you can see your image change. This is a neat trick and allows you to get the perfect tint!
My next tutorial will be easy crossprocessing with the Levels adjustment layer.
If you have any questions, please post them them in my CoffeeShop Flickr Group! And for complete info on installing all of my actions, click here!


