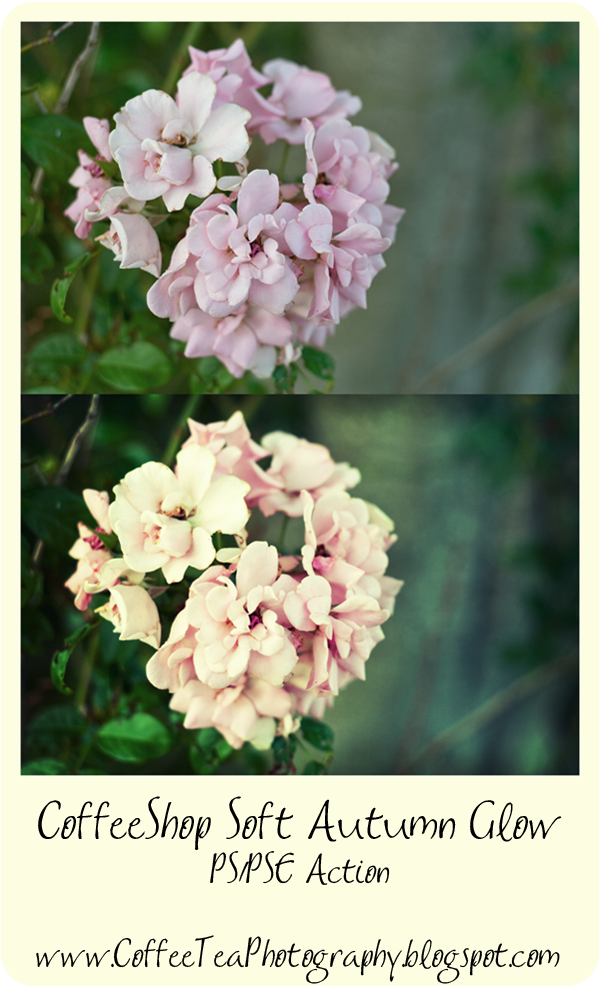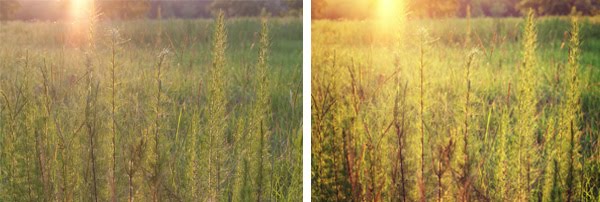
I am excited to offer a new action and tutorial; CoffeeShop Soft Autumn Glow. This action adds a soft glow and contrast boost, with a subtle yellowish tint and optional vignette. I love using this effect on landscapes and flowers, but you can also use it on portraits and weeds (see below!).


For those of you that are interested in seeing what the action does, step-by-step, I included an UnWrapped tutorial at the bottom of this post. :-)
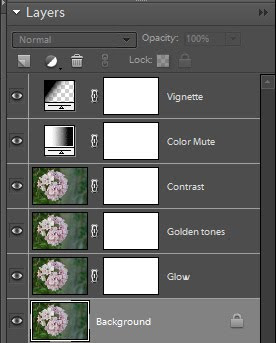
Every layer is adjustable. You can turn up the Color Mute layer's opacity to mute the color. The Vignette layer can be turned off or you can adjust the opacity of that layer (put in Overlay Blending mode for a more dramatic vignette effect).
The Glow layer can be turned off or its opacity can be adjusted. You can also add more glow during the action run (the Gaussian blur adjustment), but the setting as programmed should work for most of your images since you can dial it down after the action finishes. However, if you are starting with a very high resolution image you might want to boost it up to 8 or 10 (it is set at 5) to get more dramatic glow.
Download the free CoffeeShop Soft Autumn Glow PS/PSE Action HERE!
CoffeeShop Soft Autumn Glow Action UnWrapped Tutorial!
NOTE: This tutorial will only work in Photoshop. You can't edit Advanced Blending in PSE... But don't worry, PSE users can access this hidden feature by running the action!
1. Make 3 duplicates of your background layer. Ctrl-J three times.
2. Double click on the top layer. In the box that pops up, put the blending mode into Overlay, 100%. Then go to the Advanced Blending in the middle and uncheck the B (Blue) in the RGB channels. Name this layer Contrast.
3. Double click on the next layer down. In the box that pops up, put the blending mode into Screen, 50%. Then go to the Advanced Blending in the middle and uncheck the B (Blue) in the RGB channels. Name this layer Golden Tones.
4. Click to select the next layer down (the copy just above the background). Go to Filter, Blur, Gaussian Blur and use a setting of 5 for most images. Then adjust the opacity of that layer to taste and name it Glow.
5. Color Mute Layer: If you find your colors too vivid, add a Black to White Gradient Map Adjustment layer on top of everything and set the opacity to taste.
6. Vignette: Follow the CoffeeShop Burn tutorial to add a vignette.
Do you want to download thousands of professional CoffeeShop PSE/Photoshop actions (including exclusive ones not found anywhere for free), textures/overlays, scrapbooking papers, clip art/design elements, photo storyboards and frames, and Lightroom presets from this site in one convenient zipped file AND help support this one-woman blog?
Just click here for my CoffeeShop Mega Download Pack!


