


I love creating artistic edits in Photoshop and PSE with actions and textures, and I really enjoy sharing my editing techniques with you. This new Photoshop/PSE editing tutorial walks you through one of my favorite edits where I will show you one way I remove distracting elements from an image, add some clouds, and then run one of my favorite actions to get a beautiful artistic portrait.
If you want to follow along with this tutorial you can download the original images (young woman and clouds). I also have a set of cloud textures you can download for free on my blog.
Today I will show you how I removed distracting elements in the background of this image and added the clouds. Tomorrow I will walk you through my Rainbow Velvet Luxe action edit.
This is what the image will look like at the end of this two-day tutorial. If you are on a computer you can hover over to see the "before" image.
CoffeeShop Photoshop/PSE Tutorial: Removing Distracting Elements and Adding Clouds:

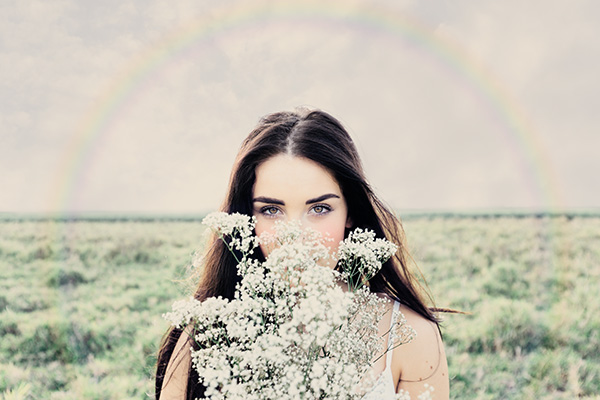
I am starting with this image. I decided to remove the hills, barn, and clouds in the background because I find my eyes wondering to them instead of the gorgeous young woman.

I added a new layer above the background and used the eyedropper tool to select the white color from the sky. Then I grabbed a brush in this color and painted out the clouds, hills, and barn. I painted on a new blank layer rather than my original image so I could easily make changes.
Editing Tip: To quickly remove elements along a straight-line horizon, grab a 50% soft brush and click on one side. Then hold down shift and click on the other side and the brush will automatically draw a straight line, point to point.

Now I will add some clouds. I love these clouds, they are very soft and subtle. When I add clouds to a sky in a portrait I prefer them to be very subtle. I don't want to look at the portrait and just see !!!CLOUDS!!!.
Open the cloud image and then click and drag on the top layer on the portrait. Then Ctrl-T it to fit.

I then dialed down the opacity of the cloud layer (41%) so I could see where I needed to remove the cloud layer from the field and young woman.

I added a layer mask to the Cloud layer and used a 50% soft black brush to remove the cloud layer from the girl and the field.
Editing Note: Press the "\" key to see where you are painting on the layer mask and press again to remove the effect.


The clouds look pretty good but I find their color tint a bit distracting. I am not going to worry about it in this edit because I am going to run my Rainbow Velvet Luxe action on the image in Part 2 tomorrow. That will take care of any distracting color tints.
But I am going to show you a trick to quickly adjust the color to match the color of the rest of the image if you don't plan on running an action.

Turn off the two top layers keeping only the background on. Then go to Filter, Blur, Average and grab the averaged-color with an eyedropper. Edit, Undo and then turn back on all of the layers.

Add a Color Fill adjustment layer on top (it will be the light green of the average blur) and group it with the Clouds layer and put it in Soft Light blending mode. Now the clouds have a slight green tint. that matches the color cast of original image.
Tomorrow I will walk you through Part 2 of this tutorial where I continue the edit by adding the Rainbow Velvet Luxe effect.
For complete info on installing all of my actions, click here.
Facebook | Pinterest | Twitter


