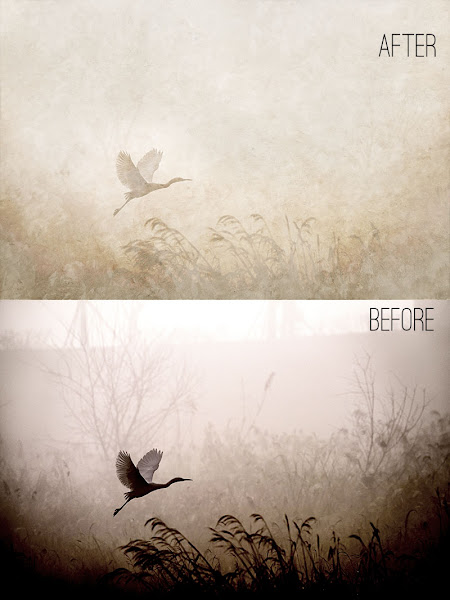
Today I wanted to show you how I edited two images using my free textures found on my "Pont Boieldieu 2" post yesterday. You can download the high resolution prints on this page.
Open original image.
Add the Pont Boieldieu ocean texture three times, all in Soft Light blending mode. On the top layer use a layer mask to remove the texture off the flowers.
Above the image add an orange to light peach/ivory Gradient Map, 25% opacity. This adds some warmth to the image.
I wanted to add some texture to the blown-out areas in the background. To do this, add a new layer and grab a soft low-opacity gray brush and paint in the areas that are blown out. This will really bring out the texture.

Open the image.
Add the CoffeeShop "Pont Boieldieu sand" texture on top in Screen blending mode, 86%.
Add a Black to White Gradient Map layer over the image and adjust the Fill to 50%. This will reduce some of the orange color of the original image.
I added some contrast using a Levels adjustment layer. I moved the Shadow slider to the right to bring out the grass and bird.
The upper part of the image was blown out and I wanted to add some texture to it. To do this I added a blank layer under the texture layer. Then I used a soft gray brush at 30% and painted over areas that were too light and didn't have any texture. This really added a beautiful soft texture effect to the top of the image.
I hope you enjoyed this little tutorial! It is so fun and easy to create your own fine art images.
Do you want to download my favorite CoffeeShop PSE/Photoshop Actions and Lightroom Presets or Design Elements in one convenient zipped file AND help support this blog? Just click here for my action pack or here for all the actions/presets and professional design elements, storyboards, and textures.


