Many of you combine my actions to get really original, beautiful results. Today I wanted to revisit two of my older favorite actions, Once Upon a Time and Sun Kissed. I am going to show you how I used them both on an image and some nifty tricks to customize both actions.
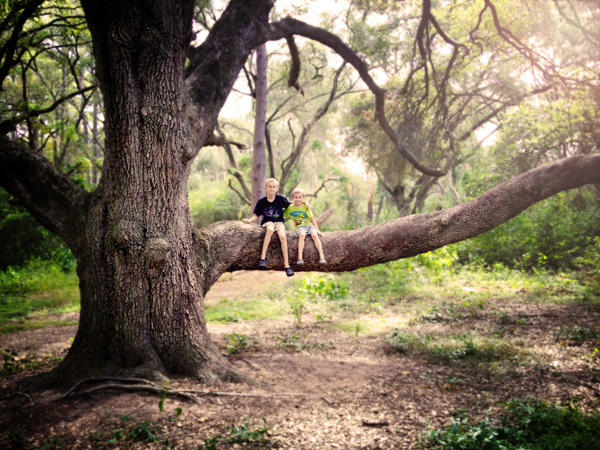
This is a low-resolution, grainy camera phone photo I took a few days ago. Pretty standard snapshot, but I think this has potential. I didn't have control of my depth-of-field so I decided to add some post-processing.
I ran the Once Upon a Time action on this image. When the selection for the area that would not be blurred came up, I adjusted it so that it would not affect my image by collapsing it down to a pixel. That way everything would be blurred. After the action finished I filled the Blur layer mask with white and used a soft black brush at 100% opacity to paint off the blur around the boys to add depth-of-field (see image below to see what I masked out). This is more accurate then simply adjusting the blur setting in the action as I wanted to keep the area behind the boys blurred. Here is my new version of Once Upon a Time that allows you to add custom blur.
I also used a soft white low opacity brush to paint in part of the tree bark in the Dodge/Burn layer to add some lightness.
If you press the "\" key you can see the area you have masked off from the Blur layer. I tried to remove blur from the parts of the image that would be in the same distance from my camera to add the depth.
Now I want to add some light so I ran my Sun Kissed action on the flattened image. I don't like the light circles on the bottom left part of the image and I think the image is too light. I think that the Photoshop lens flare effect can look very fake, but I have a simple fix (here is a newer version of Sun Kissed!).
Turn off the lens flare layer (or delete it). Make a new layer above the lens flare layer and fill it with back. Run the same Lens Flare filter on the black layer. If you have Photoshop, just go to Filter and click on the top selection, it will be the lens flare setting you adjusted in the action. Put this layer in Screen and set the opacity to taste, then use a black brush to paint out the flare effect you don't want (in my case, the light in the bottom left). Check out the new version of Sun Kissed here.
I turned off the haze and adjusted the contrast and now I have an image that makes me happy. It went from "blah" to magical! It might be a bit grainy, but this would make a great small print for my wall.
Mouse over to see the before.

I hope you enjoyed this little tutorial!
Do you want to download my favorite CoffeeShop Actions or Design Elements in one convenient zipped file AND help support this blog? Just click here for my action pack or here for a download of some of my most popular design elements, storyboards, and textures.
For complete info on installing all of my actions, click here.


