


I know many of you are like me and too lazy to drag your real camera around with you everywhere, so sometimes you end up taking lackluster shots with your phone. Sure, you can play with the filters that come with your phone, but I wanted to put together a tutorial where I start with a boring iPhone snapshot and turn it into something I might want to hang on my wall.
I used textures from the Chasing Dreams Summertime II set in this edit. Thank you for sending these textures to me Colleen, they are stunning! And right now my readers can get 20% off Chasing Dreams textures until July 31st, just use coupon code COFFEE20. I also used the CoffeeShop Sky Texture 2 in this edit. You can see the textures and blending modes I used listed in the layer pane screenshot below.

OK, lets texturize!!!

Here is a boring iPhone shot. Face it, we all have a few of these on our phone. But I think it has potential because of the sun peeping through the tree. I took this a few weeks ago when it was hot and dry, and after a few weeks of rain I am missing the sun... Today I think I need to start building my ark.

I added a levels adjustment layer with no adjustments and put it in screen blending mode. This brightened up the dark trees so I can see more detail.

I opened up the Sky 2 Texture from my Ethereal Sky Texture set. I believe the dark blue sky in the circled areas are distracting (I tested it first), so I used the cloning tool on the texture and cloned clouds over the bright blue areas circled above. You can do this after putting the texture in the desired blending mode, just click on the texture layer and make sure "current layer" is selected on top when you start cloning.

Much better. Don't be afraid to edit textures. Cloning or changing color hues can really make a difference in your final edit.

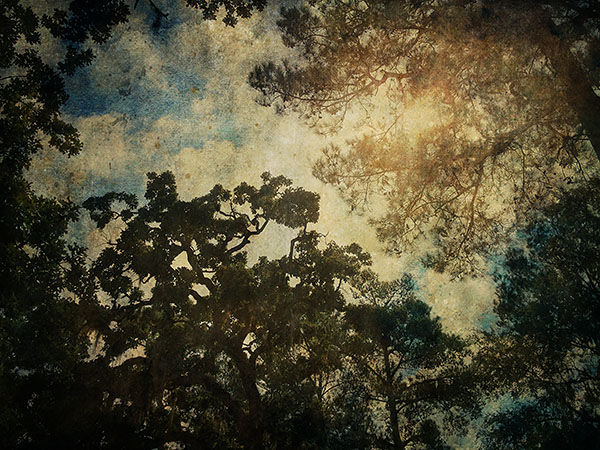
I put the sky texture in multiply blending mode and then duplicated that layer. Both layers are 100% multiply. Now my image has clouds.

I used the Watercolor texture from Chasing Dreams for the next layer.

I put this layer in Multiply, 50% opacity. Don't be afraid to try different blending modes with different opacities. I love using screen, multiply, color burn, soft light, overlay, penlight and vivid. Also changing the order of the layers can really make a difference. Don't be afraid if at first your edit is not impressive, just keep on playing.

I duplicated this layer and put it in soft light, 50% opacity, to brighten it up a bit.

I wanted some red texture around the sunburst, so I added the Festival texture from Chasing Dreams.

I put this layer in soft light, 100%. Then I held down alt and clicked to add a black layer mask to cover up the texture. I used a soft white brush on the layer mask to add the texture just in the upper right corner where the sun is coming through. I wouldn't have to mask the texture from the rest of the image, but I think it turned everything too red.

I wanted a slightly more vintage worn look, so I added the Raindrop texture from Chasing Dreams.

I put this layer in overlay, 50% opacity. I found the dot in the texture (circled above) distracting, so I used the cloning tool on that layer and cloned it out.

The annoying dot is gone. At this point I might go to the different texture layers and clone out things I find distracting in the final edit.

Hover over to see the before/after. I hope you enjoyed this tutorial! If you have questions about adding textures or using layer masks please go read through my texture tutorials.
Do you want to download my favorite CoffeeShop Actions or Design Elements in one convenient zipped file AND help support this blog? Just click here for my action pack or here for a download of some of my most popular design elements, storyboards, and textures.


