


UPDATE! I just posted a new tutorial with some tips/tricks using this action, you can read it here.
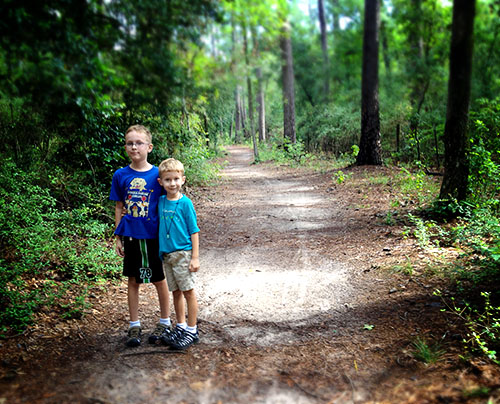
I have had so much fun the last days going to a local park and exploring the trails with the boys. I had some cute photos I took with my phone and I wanted to give them a fairy tale/enchanted forest look with saturated colors and some selective blurring. With your help on my Facebook page, I decided to call this action Once Upon a Time.
This action allows you to artistically adjust the depth of field of your subject by selectively blurring the image. It also saturates the color, adds contrast, burns the edges, and has an adjustable dodge/burn layer.
This would be a perfect action if you dressed your kids up in vintage costumes in the woods. But I did not do this because I want my sons to visit me in the nursing home when I get old. ;-) You can use this action on portraits, still life photos, and landscapes. And the action is completely adjustable.
I will post a step-by-step tutorial later so you can do this on your own without the action if you want.
Running the Action:

1. Adjust the free transform bars to taste. The area in the box will be focused, areas outside of the box will be blurred. I usually just pull down the top bar and pull up the bottom bar, but you can also drag in the sides like I did in this sample. If you can't see all of the free transform box click Ctrl-0 (zero). Press the check when you are done.
If you decide to not use the blur layer you can turn it off later.

2. Adjust the feather for your selection. Use a higher number for larger resolution images (up to 200).

3. Adjust the gaussian blur. It is preset to 8 but you might want more or less blur.

4. The action will finish running and hopefully your image will look like something you would see in a fairy tale!

5. You will have 6 layers that you can adjust the opacity or turn off. I also included layer masks so you can paint the effects off the layers if you want.
To use the Dodge/Burn layer, paint on your image with a black brush to darken (burn) parts of your image and paint with a white brush to lighten (dodge) areas. If you have to start over just fill with 50% gray.
Mouse over for before.
Download the CoffeeShop Once Upon a Time Photoshop/PSE Action! You can also download it here.
Do you want to download my favorite CoffeeShop Actions or Design Elements in one convenient zipped file AND help support this blog? Just click here for my action pack (includes this action!) or here for a download of some of my most popular design elements, storyboards, and textures.
For complete info on installing all of my actions, click here.


