Wednesday, May 02, 2012

CoffeeShop Baby PowderRoom 2 Action and Tutorial: Part 2!


This is the second part of a two-part tutorial on editing baby portraits. Part 1 of the Baby PowderRoom Tutorial demonstrated how to adjust exposure and fix blotchy red skin.  Today I am going to show you how to run CoffeeShop Baby PowderRoom 2 on your image and add an optional texture.  You can still find the original Baby PowderRoom action here, and the download for my updated version is at the bottom of this post.

And Baby PowderRoom is not only for babies, you can use it on any portrait!

Tutorial Part 2:  Running CoffeeShop PowderRoom 2 action on an image and adding an optional texture


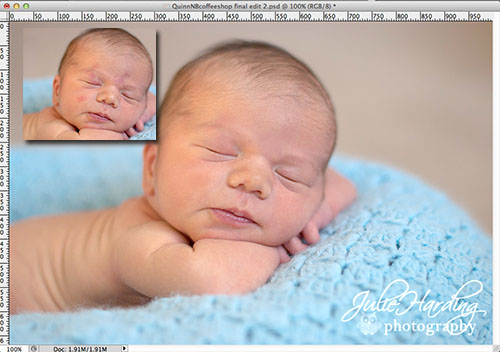
1.  Here is the image from Part 1 generously donated by Julie Harding Photography.  As you can see, I removed the red, blotchy skin.


2.  Run the CoffeeShop Baby PowderRoom 2 action (download at the bottom of this post).  The first pop-up will be Replace Color which allows you to automatically select skin for the skin-smoothing step.

Click on an area of skin to select it, and then adjust the Fuzziness slider.  Your selection will be white, so make sure you are selecting the skin but not everything in the image.

If you want to add to your selection click on the eyedropper with the  (+), if you want to remove selection click on the eyedropper with the  (-).

Press OK.


3.  Skin Smoothing:  The Surface Blur adjustment will pop-up and you can adjust the setting if you wish.  I just press OK and then lower the opacity of this layer when the action is finished so the skin won't be too smooth.


4.  After the action runs you will have 6 new layers over your background.  Your baby will probably look like a plastic doll, so time to use some layer masks and adjust opacities of layers.

If you are new to using layer masks, please go read my layer mask tutorial before using this action.  This action does not magically edit your image, you will have to use layer masks!


5.  Smooth the skin:  This action automatically selects the skin, but sometimes you have to paint out the hair, eyes, lips and end of the nose on the Smooth the skin layer.  Click on the layer mask of Smooth the skin, click "B" for brush,  and use a soft black brush in normal mode at the opacity of taste to paint over anything you don't want smooth.  I also lower the opacity of the Smooth the skin layer so my baby does not look like a plastic doll.  Please don't go crazy on the skin smoothing.

If you want to easily see what you are painting over, Alt-click on the layer mask.  The image will turn black and white as seen in the screenshot above.  The white areas will be smooth, the gray areas not so smooth, and the black areas will completely block the Smooth the skin layer.


Alternatively, you can  Shift-Alt click on the layer mask (this time I did it on the Lighten Skin layer) and the image will turn red.  Areas that are darker red are masked (the effect on that layer will not be seen), and areas that are not so red are allowing the layer's effect to shine through.  If parts of your image are not red at all, than 100% of that layer's effect is coming through.

6. Lighten Skin: If you want to slightly lighten the skin (as if lightly powdered), click "B" for brush and set your brush to Normal Mode, white, and low opacity (10-20%). Click on the black layer mask and paint over the skin. Adjust the Lighten Skin layer's opacity to taste.

7. Skin Glow: This layer adds a soft subtle dewy glow to the skin. Cick "B" for brush and set your brush to Normal Mode, white, and low opacity (20-30%). Click on the black layer mask and then paint over the skin. Adjust the Skin Glow layer's opacity to taste.

8. Eye Define: This layer enhances eyes and eyelashes. Click "B" for brush and set the brush to Normal Mode, white and 50-100% opacity. Click on the black layer mask. Paint over the eyes and eyelashes. Then adjust the Eye Define layer's opacity to taste.

9. Bright Eyes: This layer brightens the iris and whites of the eyes. Click "B" for brush and set the brush to Normal mode, white, and 10-20%. Carefully paint over the iris, avoiding the pupil, and the whites of the eyes. Then adjust the Bright Eyes layer's opacity to taste.


10.  Levels layer:  You can use the Levels 1 adjustment layer to make final adjustments to exposure and color.  Set to RGB to adjust the highlights/midtones/shadows.  And use the slider to select Red or Blue to remove/add yellow/red.  The Blue setting allows you to add/remove yellow.

In this case I wanted a bit more red in this image, so I set the drop-down to Red and slightly moved up the middle (gamma) slider.


11.  Add an optional texture:  I wanted to add a texture to this image, and I picked a beautiful texture called Old Bench from the Chasing Dreams Summertime 2 Texture pack.  Right now, use the code summer20 for 20% off the Summertime II Collection. It's good through the 6th.  And check out Colleen's bundled texture specials!  I love Colleen's textures.


Drop the texture on top of your image and free transform it to fit (Ctrl-T).  I put the texture layer in soft light mode in this case, but you can try overlay, multiply, or even vivid light and adjust the opacity to taste.


12.  Removing the texture from the baby:  In this case I didn't want the texture's colors affecting my image, so I clicked on the texture layer and desaturated it (made it black and white).  Then I added a layer mask, clicked to select it, and used a soft black brush at 100% opacity to paint out the baby.

I hope you enjoyed my newest retouching tutorial! I would love to see before/afters posted on my Facebook page.

Download the free Baby PowderRoom 2 action for Photoshop and PSE here.

Do you want to download my favorite CoffeeShop Actions or Design Elements in one convenient zipped file AND help support this blog? Just click here for my action pack (includes this action!) or here for a download of some of my most popular design elements, storyboards, and textures.

For complete info on installing all of my actions, click here.

38 comments:

  1. I am like you I have no babies to play with it on :( Thank you for everything !

    ReplyDelete
  2. Nicely done. Great detail on explaining what you've done.

    ReplyDelete
  3. Thank you!! I can't wait to play with this!

    ReplyDelete
  4. Love IT! Can't wait to give this a try on my own

    ReplyDelete
  5. I just downloaded this...and WILL love it, if only I could get the action prompts to get to the next step. I'm stuck on the Smooth the Skin step. It's leaving me hanging!!! What do I do next?!!
    :)

    ReplyDelete
  6. I love, love, love the original Baby Powder room amd use it all the time. But I'm having difficulty with version 2.

    I am not getting a layer adjustment for smooth skin, and keep getting the messages: the command "make" is not available; the command "select" is not available. What am I doing wrong?

    Running PSE version 8 on Windows 7

    ReplyDelete
  7. Love your tutorial : ) you are so talented my friend!!!!

    ReplyDelete
  8. I can't wait to try this. I have a new Grandbaby and anticipate lots of photos. :) Photographing babies is new for me, so I'm certain this will be a huge help.
    Tanks so much.

    ReplyDelete
  9. I love the original Baby Powder Room! I am excited to use Baby Powder Room 2; however, I'm experiencing the same problem with "the command "make" is not available; and the command "select" is not available". Not sure what I'm doing wrong. I'm working on PSE version 7.

    ReplyDelete
  10. Hi,
    I would love to use this action, but am having a problem, and was wondering if anyone found the solution to the commands 'make' and 'select' being unavailable. I am also running PSE 8 on windows 7. Thanks for any help. Can't wait to use this action on a baby shoot I did yesterday!

    ReplyDelete
  11. I have showcased your amazing Photoshop actions in my roundup and I hope that you will like them. To download these action people will visit your page, So you can get full credits.


    Thanks

    ReplyDelete
  12. Rita, I can't thank you enough. This action is my go-to every time I edit a portrait. It is truly a miracle, and I'm so grateful. Thanks again!

    ReplyDelete
  13. Thank you! Thank you! Thank you! I can't wait to try out this action!! Love, Jennifer N.

    ReplyDelete
  14. if you are experiencing these errors as i was make sure you have an image open before clicking on the action. once i opened an image then it worked great on photo elements 11! thanks so much for the amazing actions!!!

    ReplyDelete
  15. I have an image open and keep receiving the message command and make not available? I am working in PSE 8, help please!

    ReplyDelete
  16. Make sure your image is flattened before running this action. :-)

    ReplyDelete
  17. Hi I'm new to editing and I'm hoping someone can help me. I'm not seeing any changes when I make them to the layers. My photo isn't looking like a doll by that step. What am I doing wrong? Im using elements 10. Thanks

    ReplyDelete
  18. You have to paint on the layer masks to see changes on many of the layers. :-) Rita

    ReplyDelete
  19. Thank you so much Rita! I talked with you on Facebook a few days ago. I am still learning but LOVING everything you have so generously offered. Thank you, again! :)

    ReplyDelete
  20. The skin smoothing method in this action is genius! How would one do this manually? I understand how to use Color Replace, but how do you use it with the surface blur? Thanks! Caryn

    ReplyDelete
  21. Thank you so much for the action. I just used it on PSE11 and it works perfect! Really helped with a couple of under exposed photos too.

    ReplyDelete
  22. Hi Rita, I always used BabyPowderRoom with great pleasure and succes (thank you!!), but have now updated from CS4 (in English) to CS6 (in Dutch) and BPR doesn't seem to work anymore. Can't find the 'background' layer, it says. Is this because I got the Dutch version of CS6? Anyway I can work around this?

    ReplyDelete
  23. Anne, some of my actions won't run in non-English versions of Photoshop. I have heard of go-arounds, but I don't know how to do it myself. Would it be possible to call Adobe and ask for an English version?

    ReplyDelete
  24. I can't even get my action to start/run. I have an image open and am using CS4 on a Mac. I have used other actions from this site before but it has been a while. What am I missing? I have tried a flattened image, unlocked layer, copied layer, etc.

    Help :)

    ReplyDelete
  25. I just figured it out. I was clicking on the action name not the first step. My apologies!

    ReplyDelete
  26. I also keep receiving the message command and make not available? I am working in PSE 8, and the image is flattened before running the action.

    ReplyDelete
  27. I am having trouble having the files save correctly. They save as a zip but they will not extract nor will they open in my PSE11. Any help would be appreciated!!

    ReplyDelete
  28. Megan, try a different unzipping program, there are tons of free ones out there. You have to unzip them before loading them. And i never right click and load, I always load actions through the program. It works better.

    ReplyDelete
  29. Hello! I would love to use this but I can't get it to download to my computer. I have had this issue with several of your actions, but not all. It gives me an MACOSX option instead of the actual action.

    ReplyDelete
  30. Hi, the action runs seamlessly and I can see all the layers, but the image itself never changes. I have played around with the layers the opacity, but nothing. I'm new to actions but not PSE, does anyone have an idea what I'm doing wrong?

    ReplyDelete
    Replies
    1. You have to paint on the layer masks! If you read the post I explain how to edit ian image step-by-step. :-) Rita

      Delete
  31. I am really confused! I downloaded this action into my PSE 12. The action does everything but doesn't give me pop up windows! Am I suppose to get pop up windows?

    ReplyDelete
    Replies
    1. Try resetting your preferences. It should work in PSE12. :-)

      Delete
  32. HI Rita! I love this but when I run the action the smoothing works but when I try to ue the other layers it doesnt seem to be working. I am painting on the layer masks but I am not seeing a difference. I have the opacity at 100% so I can see a difference but I cannot. Any help would be much appreciated. THanks

    ReplyDelete
    Replies
    1. Make sure your brush is in normal mode and if that doesn't work reset your photoshop preferences, that should fix it.

      Delete
  33. Has anyone solved the 'command make is not available" problem? I see many people have run into it... thanks so much!!!

    ReplyDelete
    Replies
    1. Start with a flattened jpg or png and if it doesn't work reset your photoshop preferences. That usually fixes it.

      Delete

Thank you for taking the time to leave a message, I love reading them! All comments are personally moderated by me and I will post and answer them them as soon as possible.
Rita