I hope to explain why you should love layer masks in this post. Your main lesson today: Black conceals (fat) and white reveals (fat). The "fat" part was added by me. ;-) My screenshots are from Photoshop Elements, but the same tutorial applies in Photoshop, except you don't need an action but rather can add layer masks by clicking on the little icon on the bottom of your layer pane. Edited to add that PSE9 does have a layer mask button FINALLY so you don't have to use my layer mask action!
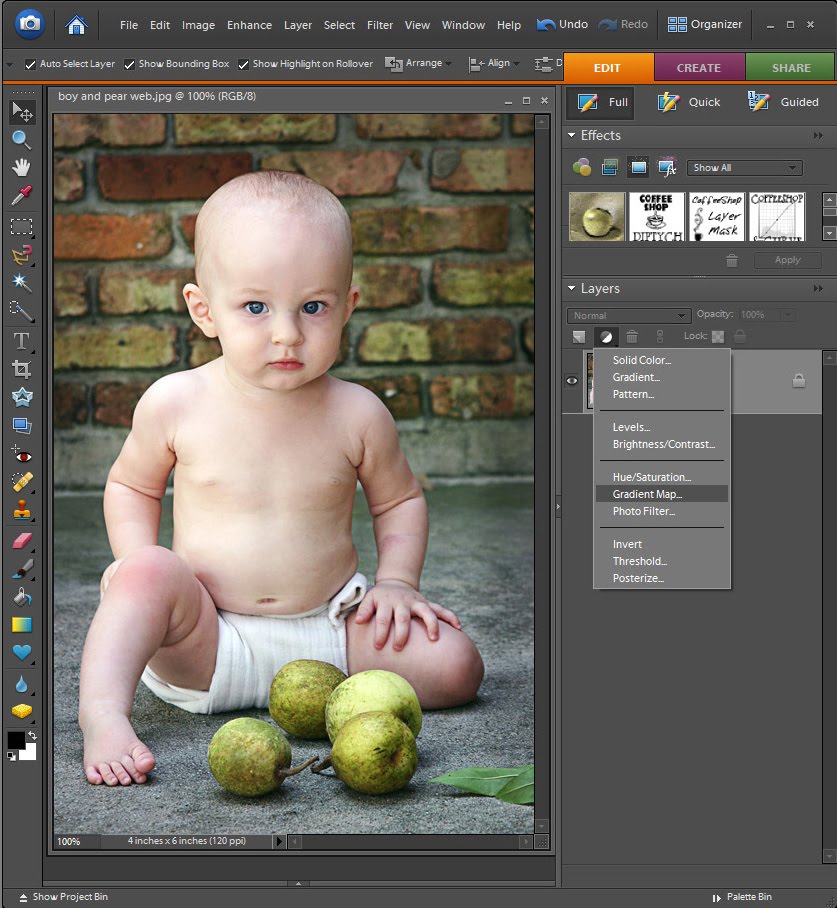
If you add an adjustment layer to your image it automatically has a layer mask built in with the layer. You can see the PSE adjustment layer pop-down menu above.
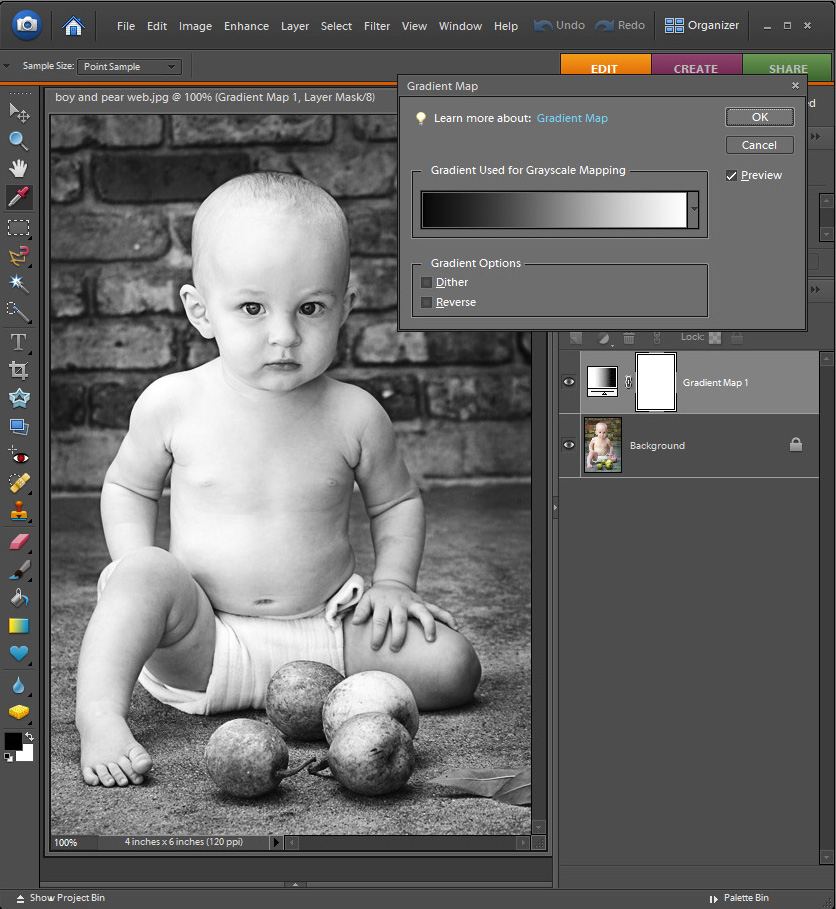
In this case I am adding a black to white Gradient Map adjustment layer. This is a great quick way to turn your image B&W. Make sure that your foreground color is black and your background color is white to get this effect. Notice the white box next to the gradient layer thumbnail in your layer pane. This is your layer mask.
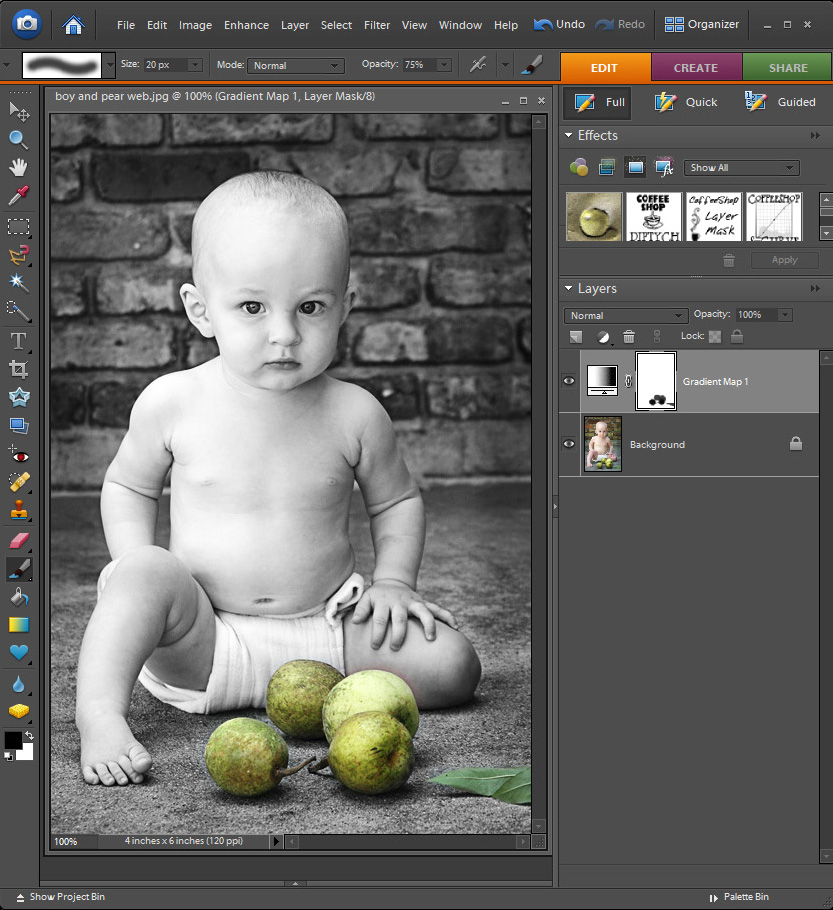
Now I will show you how to use a white layer mask. If the layer mask is white, that means that the effect on that layer is not "masked", or covered up. In other words, the image is B&W because the gradient mask layer is not painted in black. White Reveals, Black Conceals; remember? I want to "paint" back in the pear's colors.
So I then 1. Select the brush tool (B to select), make the brush black (D) 2. Go to the top menu and make my brush soft. 3. Adjust the brush size. 4. Make sure the brush blending mode is set to Normal, and 5. Adjust the brush opacity to taste. In this case I used an opacity of 75% because I did not want my pears to be too bright and colorful. If I used 100% then the original color of the pears will show. You can also use a low opacity brush and rebrush over areas to add more "color".
After selecting my brush tool I clicked on the layer mask to select it and then painted over the pears in my image. If you don't click to select the layer mask you will paint black over your image. You can adjust the size of your brush on the fly by using the [ and ] keys. A soft brush allows your lines to be feathered, but you can switch to a hard brush if you don't want any feathering. If you make a mistake you can switch to a white brush (just change your foreground color to white, press X) and brush over the area you wish to remove color from the image. Notice in the layer mask that you can see black where I painted over the pears. The black "masks" or "conceals" the black to white gradient mask, so wherever I paint black you can't see the effect of that layer. And my pears are now colorful!
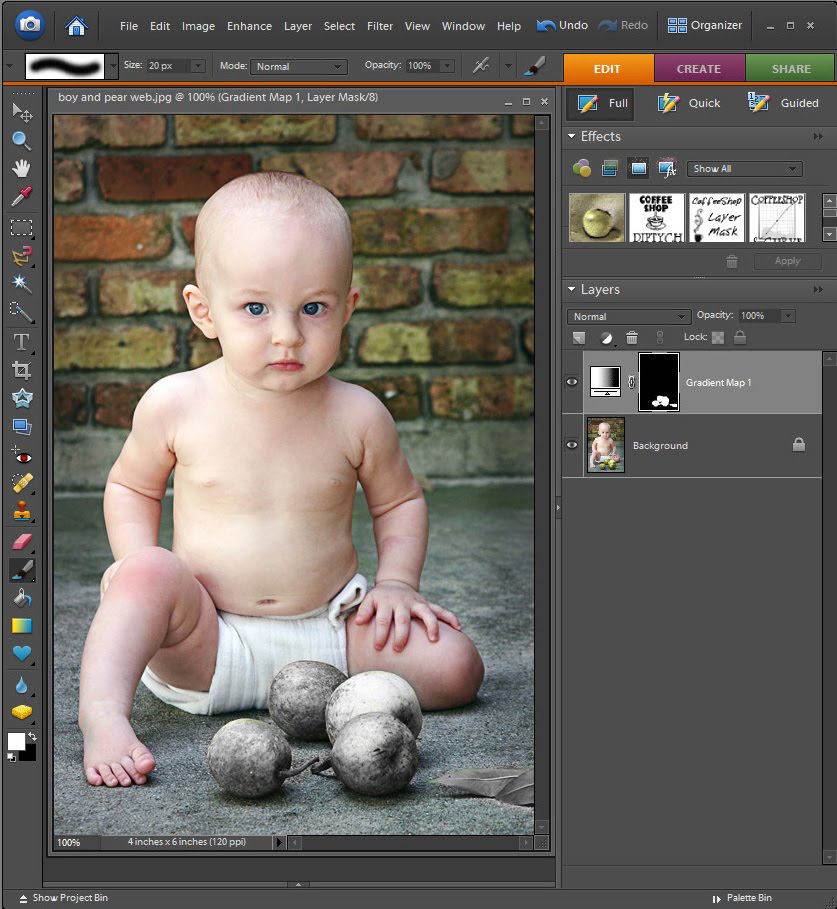
Maybe you want your entire image color and just your pears B&W (well, maybe not, but let me show you anyway!). In this case you want to mask everything but the pears. So click on your layer mask, then Edit, Fill with black and use a soft white brush to paint over the pears. The white "paint" on the black mask reveals that layer's effects on the image. Don't forget to select the mask BEFORE painting over the image!
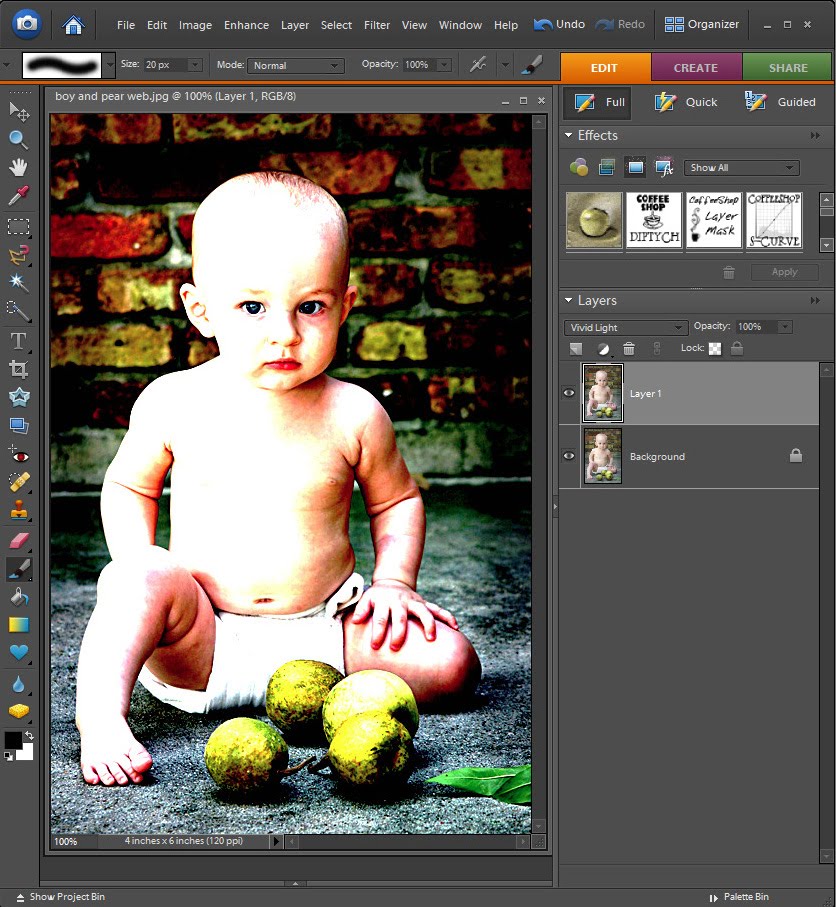
Here is another mask example. I wanted to make the background of this image really contrasty and gritty. I Ctrl-J (made a duplicate) of the background, and put this layer into Vivid Light Blending mode. Yuck, the skin tones of the baby (little Duke years ago) are really horrible. No problem! I will mask out his skin.
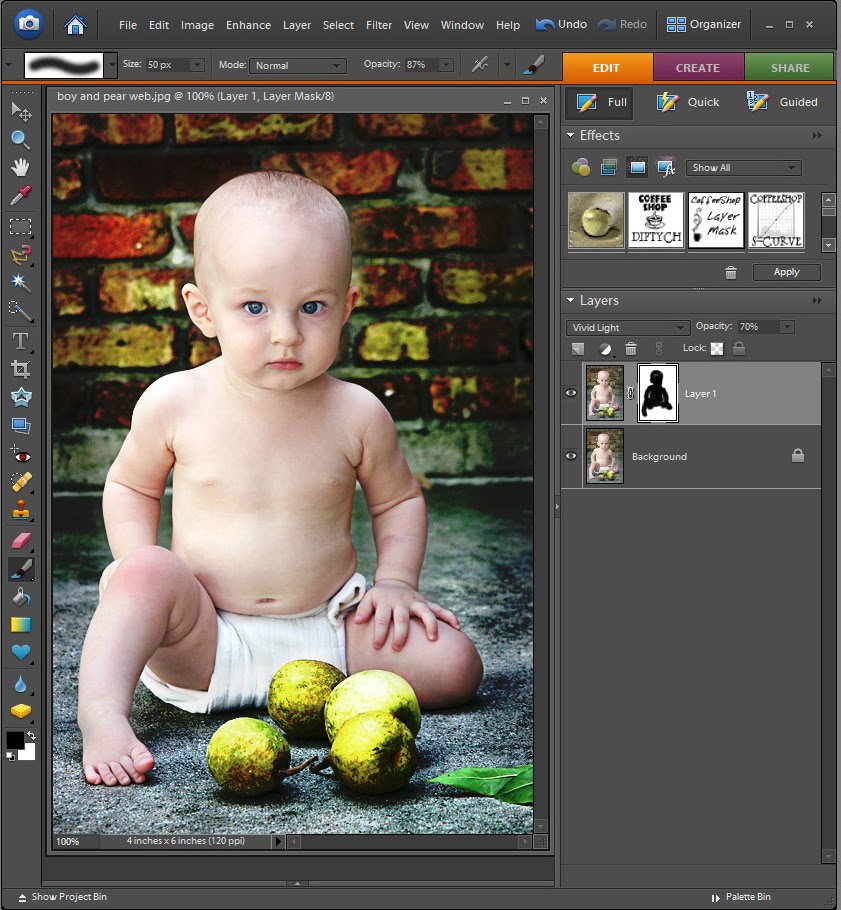
As you can tell Photoshop Elements and Photoshop do not automatically add a layer mask to copied layers. In Photoshop just click on the little layer mask icon on the bottom of the layer pane. If you have Photoshop Elements, download my layer mask action and click on the thumbnail to add a layer mask to that layer (PSE9 does have a layer mask button). Then select your brush, make it black and soft, adjust the brush opacity to taste (I used 87% here), and click to select your layer mask. Then paint over the baby to remove the Vivid Color pop off his skin. Look at my layer mask, see the black baby outline? Black concealed the vivid color pop on his skin.
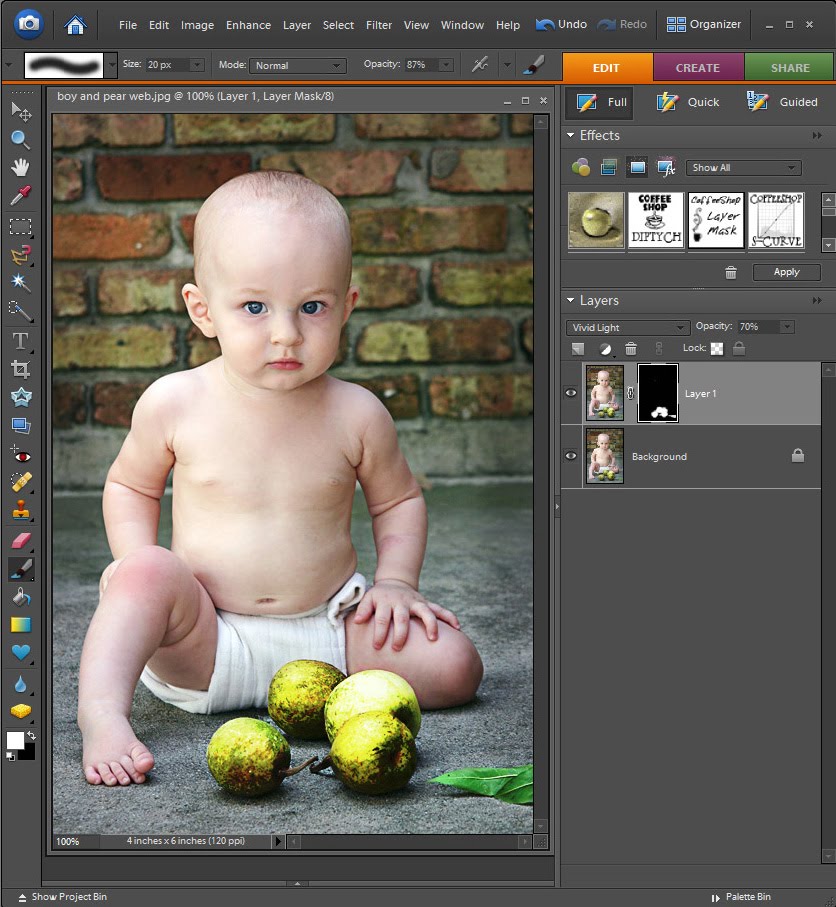
Maybe you just want the Vivid Light pop on the pears. Click on your layer mask, Edit, Fill with black, and use a soft white brush to just paint over the pears in the image. Now the Vivid Light blending mode layer is completely masked by black, except the pears. Notice the white pear outlines in my layer mask. The white paint reveals that layer effect.
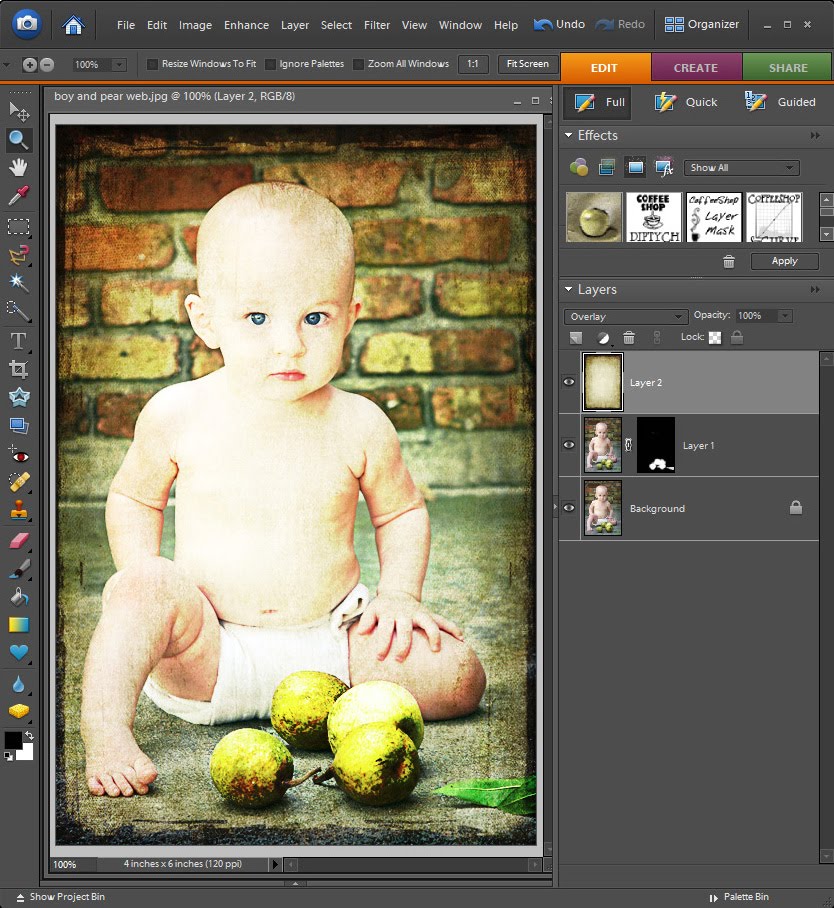
One of the biggest reasons you will use layer masks is for adding textures. I added this lovely Florabella texture to my image, above the Vivid Light blending mode layer and put the texture layer in Overlay blending mode. Now Duke's skin is completely blown! I could lower the opacity of that layer, but then I loose the texture effect over the rest of the image. Time to apply a layer mask!
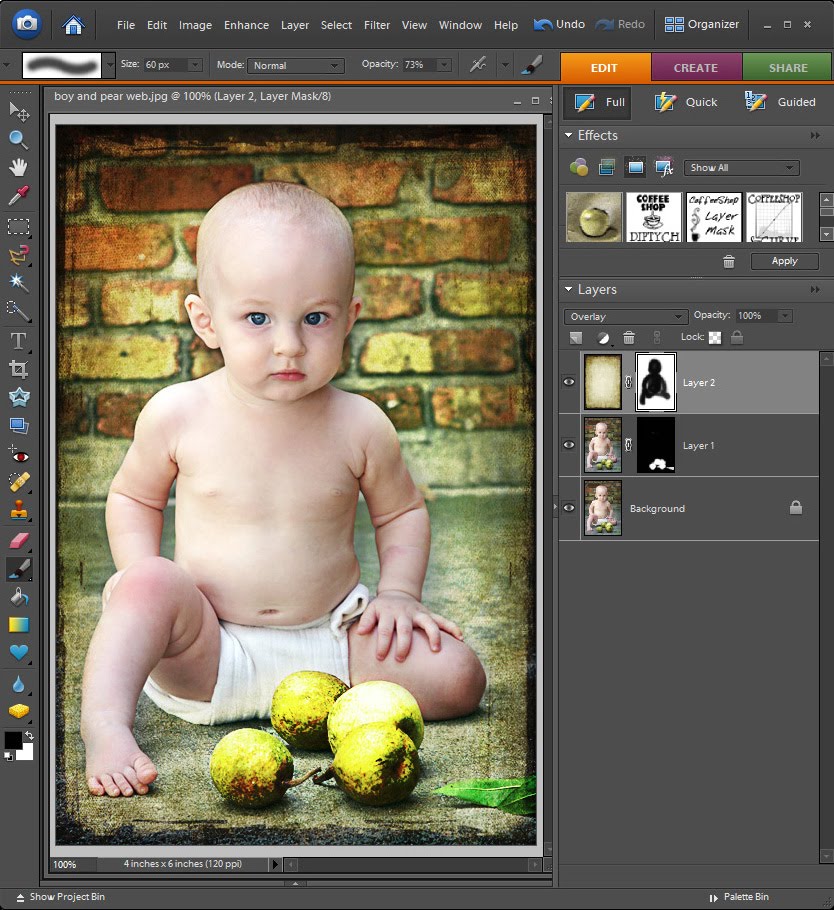
As you can see I added my layer mask, clicked to select it, and then painted over the baby with a soft black 73% opacity brush. Now Duke's skin looks so much better. Look at the two layer masks above. The top texture layer one has the baby painted in black (I removed the texture from the baby by hiding it with black paint) and the bottom Vivid Light layer one has the pears painted in white (to give them a color pop). You can use layer masks on every layer if you want!
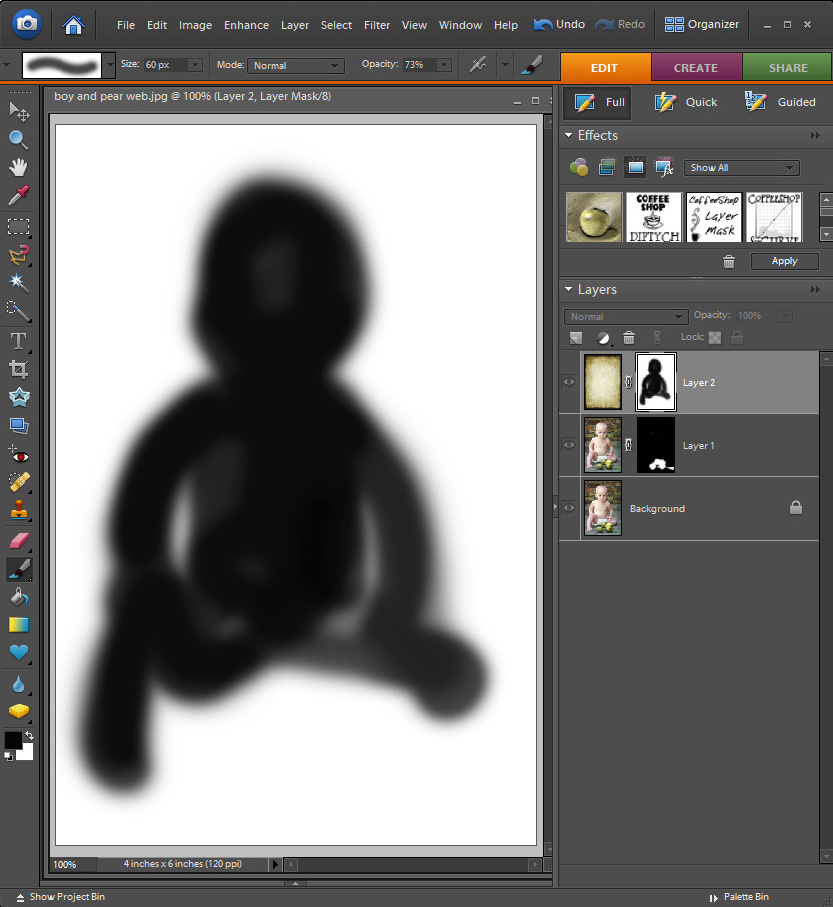
Here is a nifty trick. Atl-Click on the top layer mask with the baby outline and you will see how well I painted in the baby. Atl-Click on the layer mask to return the image to normal. You can also use the keystroke \ to turn this red mask off and on.
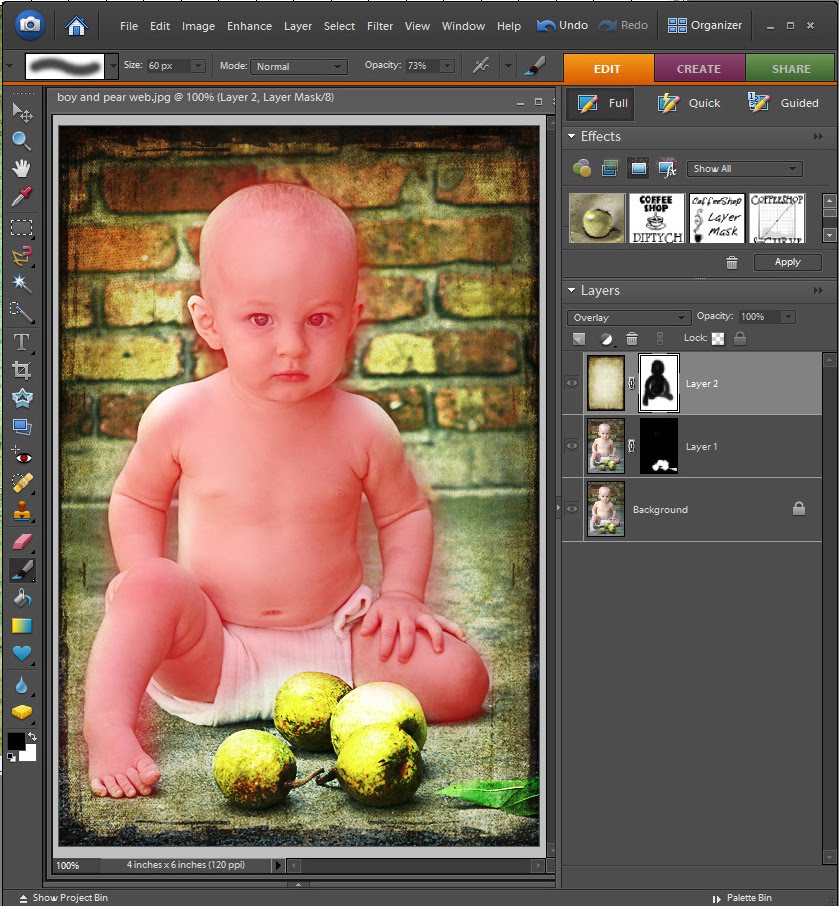
Maybe you want to see how well you are masking your image as you paint. Just Shift-Alt (Option)-Click on the layer mask and wherever you paint black on your layer mask will show up red on your image. To remove this red just Shift-Alt-Click back on the layer mask. This is a great method that allows you to touch-up your layer mask. To erase the layer mask where you ran off the image, just switch to a white brush and brush over the areas you wish to remove from the mask.
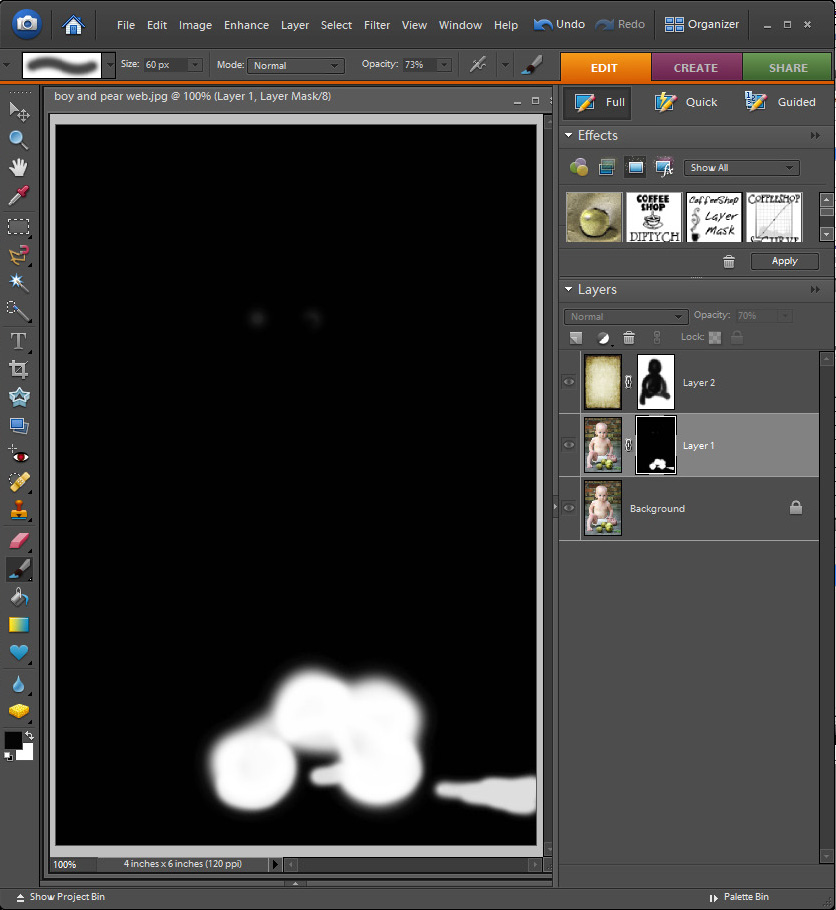
Now click on the lower layer mask with the pears in white. Alt-Click on the layer mask and you can see your pear mask.
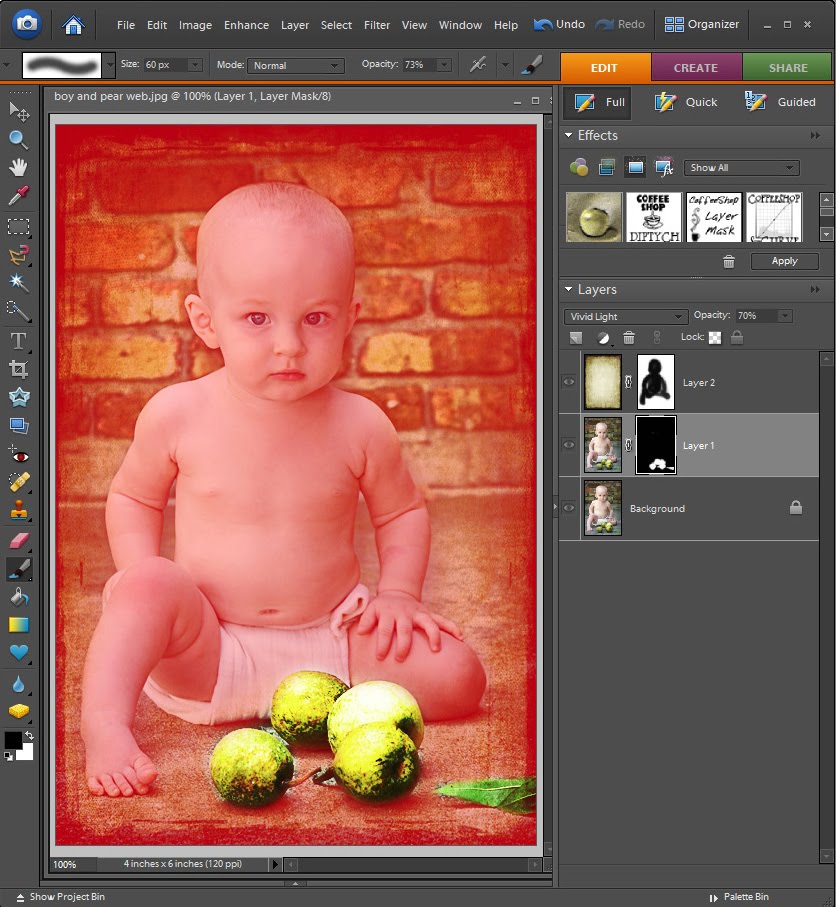
Now Shift-Alt-Click on the layer mask and the black part of your mask turns red and the white part over the pears is not red. Now I can touch up my pears masking if I want.
I hope this little tutorial made layer masks a bit more understandable. Once you figure out how to use them you will find yourself playing with them all of the time!
Do you want to download my favorite CoffeeShop PSE/Photoshop Actions and Lightroom Presets or Design Elements in one convenient zipped file AND help support this blog? Just click here for my action pack or here for a download of some of my most popular design elements, storyboards, and textures.


