


Today I am going to continue the step-by-step tutorial for my newest effect, CoffeeShop Luminous. Please visit CoffeeShop Luminous, Part 1 before starting this tutorial.
I am going to release the action tomorrow, but I first wanted to walk you through the complete edit. This action and tutorial are for more advanced users of Photoshop/PSE as you have to be familiar with using layer masks.
CoffeeShop Luminous Photoshop and PSE Tutorial:

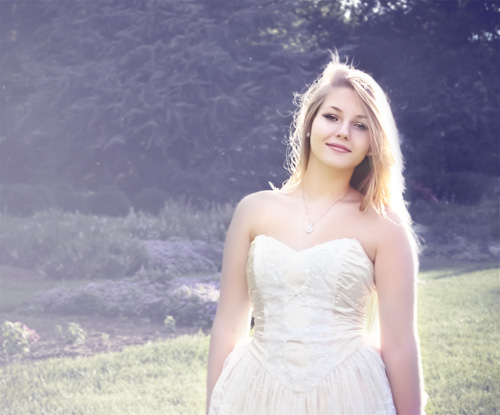
This is where we left off a few days ago.
I am using this beautiful image from Photography by Ziza & Lara.

1. Add Hazy Light: I wanted add some hazy light to soften this image. Add an ivory Color Fill adjustment layer on top (I used color fbf6e0).

I like to add a black to white gradient mask (G) on the hazy light layer so the haze is not the same opacity all of the way across the image. You can decide where to add this mask depending on the light in your image.

I dragged the black to white gradient tool from the upper right to the lower left and made the opacity of this layer 60%.

Then I used a soft black low opacity brush to remove some additional haze off her skin.

2. Add Matte: I added a soft matte effect on this image. I will show you two methods, one that can only be used by Photoshop users. Please adjust these to taste on your own image.
Photoshop Users Only: Add a Curves adjustment layer and drag the lower left point on the RGB setting up and to the right as seen in the screenshot. My Output was 47 and my Input was 41.

PSE and Photoshop Users: Add a Levels adjustment layer and drag the left Output Level slider (on the bottom) out to approximately 47 and the shadow's slider (on the left) to the right to darken the shadows.

3. Color Tint: Next I wanted to add a soft blue tint. I am going to show you two methods, one that only works in Photoshop.
Photoshop Users Only: Add a Curves adjustment layer. Select Blue and drag the lower left slider up to add soft blue tint to the shadows. In this edit my Output was 46 and my Input was 0.

PSE and Photoshop Users: Add a Levels adjustment layer and drag the left Output Level slider to 46 and the mid tone slider under the curve (the middle one) to the left (I used 1.20). Please adjust these to taste.

I used a soft black low opacity brush to remove some of the blue tint from her skin. If you used the Curves adjustment layer to add the tint this step might not be necessary.

4. Skin Brighten: This is a very important part of the edit and makes your portrait really stand out. Add a Levels adjustment layer with no adjustments, put that layer in Overlay blending mode, and add a black mask (so you don't see any changes in your image).

Use a soft white brush at 100% opacity to paint back in skin and hair. Adjust the opacity of this layer to taste.

Finally, resize/crop the image and you are done! I really love this edit and hope you enjoyed following this tutorial. I will post the free action tomorrow.
Mouse over to see the before.
Do you want to download my favorite CoffeeShop PSE/Photoshop Actions and Lightroom Presets or Design Elements in one convenient zipped file AND help support this blog? Just click here for my action pack or here for a download of some of my most popular design elements, storyboards, and textures.
For complete info on installing all of my actions, click here.


