


Today I am excited to post my newest free action, CoffeeShop Magical Forest Light. This action allows you to create beautiful images by adding light, color, and texture. You can use this action on nature and city scenes, and even on portraits. Like most of my actions, Magical Forest Light is completely adjustable.
CoffeeShop Magical Forest Light Photoshop/PSE Action Tutorial:

If you want to use the same images I did for this tutorial, you can download the forest scene from here and the rabbit photo from here.

1. This action works best on images with light shining through trees or buildings. I loved this forest image I found at Unsplash, but I wanted to add a focal point in the middle. In this case I added a rabbit (a deer was my second choice). I cropped the rabbit out of the original image from Pixabay, dragged it on the forest image, and then added a Level's adjustment layer to the rabbit layer and adjusted its contrast and color so it looked like it belonged there.
My husband pointed out that the rabbit is a bit too big for the image (he called it "The Monster Rabbit"). I tried to make it smaller, but then you wouldn't be able to see it in this tutorial as the final image is quite small. So if the perspective is a bit off, it is my fault.
We could stop here if we wanted, I think it looks great. But why not add a bit of magical light?

2. Start the action. When the Motion Blur pane comes up, adjust the angle and distance to make it look like light is streaming down through the forest.

3. Select a texture from your hard drive. I used JJ-3 from the JJ set from Shadowhouse Creations.

4. Free transform the texture to fit. Click Ctrl-0 (zero) to zoom in and out if needed.

5. Blur the sun rays by adjusting the Gaussian Blur radius. You want to soften them so they don't look too fake.

6. This is my final image with no adjustments. It needs some work, but it won't take long using layer masks.

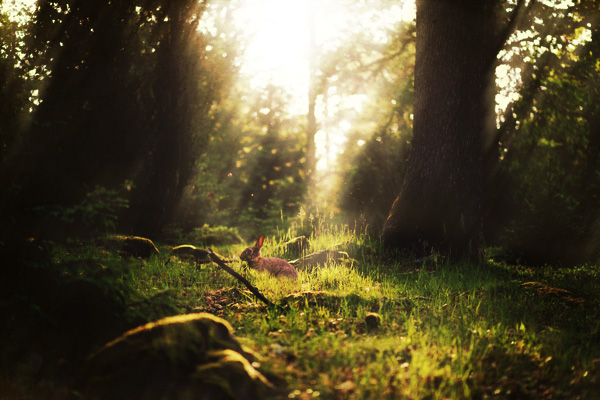
7. This is the final image. I reduced the texture color to 82% and clicked on the layer mask of the Rays of Light layer and used a black low-opacity soft brush to partially remove the light from the bottom and sides. I also adjusted the Make it Evening layer by adding more shadows (right slider) and adding some midtone light (middle slider).
Each image will need its own custom adjustments. You can also adjust the color of the image/light by changing the Color Fill layer on top.
Here is my final edit. Mouse over to see the before.
I hope you enjoy playing with this new action. Please post your best before/after images on my Facebook page, I really love to see your work! I often feature these reader photos on this blog (with the photographer's permission of course), so you get free advertising for your photography and my readers get to see your beautiful work. ;-)
Download the CoffeeShop Magical Forest Light Photoshop/PSE action. You can also download it here.
Do you want to download my favorite CoffeeShop PSE/Photoshop Actions and Lightroom Presets or Design Elements in one convenient zipped file AND help support this blog? Just click here for my action pack or here for a download of some of my most popular design elements, storyboards, and textures.
For complete info on installing all of my actions, click here.


