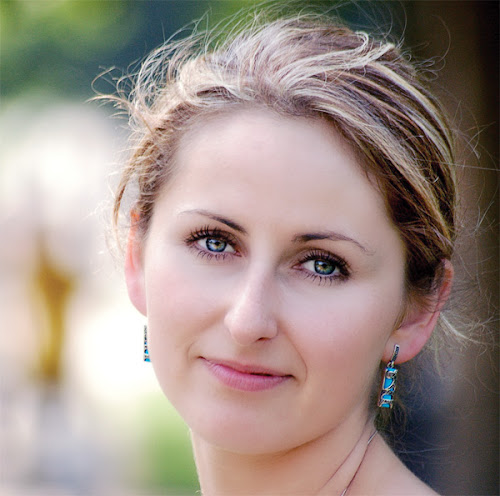
Today I am posting a new retouching action and tutorial on how to use it. This is the third part of a three part portrait retouching tutorial. You can read how to remove color casts (Part 1) and skin imperfections and shadows (Part 2). I am using this image from Pixabay.
I was working on this tutorial using one of my favorite retouching actions, Perfect Portrait 3. I love this action because it has the auto-skin smoothing option (that I proudly invented). But Perfect Portrait 3 is a huge action with many layers, and I often don't use all of them. So I wrote a streamlined version that eliminates some of the extra layers and improved a few of the remaining layers and called it Perfect Portrait 3 Express. This action does not replace the original action, but it is perfect when you have an image that is already color/contrast adjusted and just needs some retouching.
As you can see in the two images above, the original image really needed some work. This is a lovely model and she should not have to suffer from bad lighting and unfortunate color casts.
Today I am going to run Perfect Portrait 3 Express on the image that you see above labeled "before". I want to note that I overdid the editing (especially the eyes) so that you could easily see where I was making changes. Normally I would be more subtle in my retouching. Don't make your portraits look like they have plastic skin and doll eyes!
CoffeeShop Perfect Portrait 3 Express Action Tutorial:
Here is my image after fixing color casts and skin imperfections/shadows. She is looking much better, but we can make her look stunning with some virtual makeup.
1. Run CoffeeShop Perfect Portrait 3 Express (download on the bottom of this post). When the Replace Color pane pops up, use the eyedropper to select skin for the auto-softening feature. Adjust Fuzziness to taste. You can further edit this layer later.
2. This is what the image looks like after running the action with no adjustments.
3. Smooth Skin: I usually start at the top layer and work my way down. In this edit the model's light hair was selected with the skin and "smoothed". I used a black soft high opacity brush on the layer mask to remove all skin smoothing from the hair. I also used a soft white low opacity brush to add skin smoothing to a few areas the action missed. You can also adjust the opacity of this layer.
Note: To see this black and white version, alt or option click on the skin smoothing layer mask. To switch between white and black brushes, click D for default and then X to switch.
4. Bright Eyes: Click on the gray layer and paint over the iris with a low opacity soft white brush. Adjust the opacity to taste. I over-edited the eyes so you could see the difference.
5. Eye Define: Use a low opacity soft white brush on the Eye Define layer mask to add sharpness to pupils/iris, lashes, etc. Adjust opacity to taste.
6. White Whites: Use a soft low opacity white brush on the White Whites layer mask to slightly whiten the eye whites.
7. Urban Grit: I use a low opacity soft white brush on the Urban Grit layer mask to add some a pop of contrast/sharpness to her hair and earrings.
8. White Teeth, Sharpen, and Boost:
White Teeth: If you want to whiten teeth, use a soft low opacity brush on the White Teeth layer mask. Make sure to zoom in and don't lighten the gums.
Sharpen: You can adjust the Sharpen layer opacity. This layer should sharpen eyes/lashes/hair and you can adjust the opacity to taste.
Boost: This layer adds brightness to skin. You can adjust the opacity or paint on the layer mask to make adjustments. In this edit I turned down the opacity a bit.
9. Vivid Color: To add a color pop to your image, use a soft white low opacity brush and paint over the layer mask. I added some color to her hair and earrings.
10. Remove red from skin: She has some red around her eyes and on her ears, so I used a soft light middle opacity brush on the layer mask to remove the reddish tint. This layer also works great to remove red spots from the face.
I am finished! Pretty easy, right?

Mouse over to see the before.
I hope you enjoy using this new action and tutorial. If you have action/tutorial ideas, please don't hesitate to leave a comment here or on my Facebook page. I am always looking for new ideas.
Download the CoffeeShop Perfect Portrait 3 Express Photoshop/PSE action. You can also download it here.
Do you want to download my favorite CoffeeShop PSE/Photoshop Actions (including this one!) and Lightroom Presets or Design Elements in one convenient zipped file AND help support this blog? Just click here for my action pack or here for a download of some of my most popular design elements, storyboards, and textures. You can receive free updates for up to two years after your purchase.
For complete info on installing all of my actions, click here.


