


In this case, I had an image of a bride (processed with CoffeeShop Attic Vintage Action ), and I wanted to fill the text with a pattern created from the yellow in her flowers. This is a sample from my header. To create the custom pattern, just select an area in your image using your marquee tool. Here I selected a yellow area of the rose that did not have much detail.
 Edit, then Define Pattern. Name your pattern and press OK. Ctrl-D to remove the selection ants.
 Now select the text you want to use (make sure it is big enough so you can see your texture!) and type it in.
 Now create a new layer on top. Photoshop Users: Please skip down until you see the Photoshop Only Tutorial...
 Edit, then Fill Layer, and select Pattern and find your pattern in the pull-down menu. Press OK.
  Now your image and text are covered by the pattern.
 Making sure the pattern layer is selected, type Ctrl-G. This will group the text with the pattern and you should see your text become filled with your pattern. At this point you can make any changes to the text (size, shape, etc.) and you can also move the pattern around (make sure that layer is selected) with the move tool to find the best placement on your text.
 Here is a sample with a pattern I created using the leaves of the image.
 Now you need to simplify the text (which means you will not be able to edit it as text anymore, but you can still Ctrl-T free transform it if you want). Right click on the Text layer and select "Simplify layer".
 Right click on the pattern layer and select "Merge Down".
 Now if you want to add a color stroke to your text, go to Edit, then Stroke Selection.
  Enter your stroke width, color, and location and press OK.
 Now click M to get your move tool, and move the text to its best location. Then flatten the image.
Hope you guys find this tutorial useful. The next tutorial will be a step-by-step tutorial on designing your own custom blog header. If you have any questions, please post the question at my CoffeeShop Flickr Group for a resident group of experts willing to help you out!
These Instructions are for Photoshop Users ONLY!
 With your text layer selected, go to Layer, Pattern Overlay,
 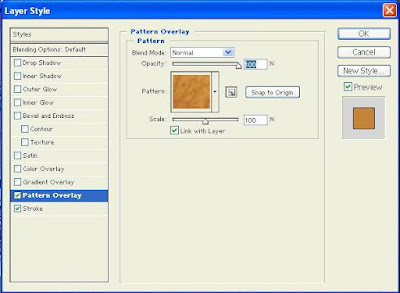 Find your new pattern in the pull-down menu and press OK. Then go to Layer, Stroke.
 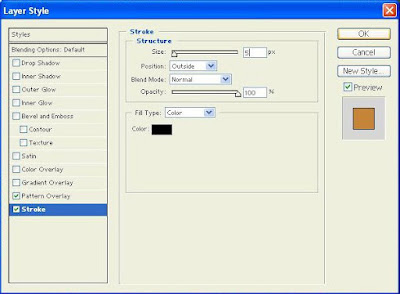 Enter the size, position, and color. Then make any adjustments to your text and flatten the image.


