----------
Happy Valentine's Day!
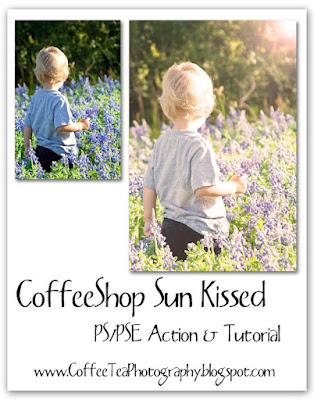
Today I want to talk about lens flare. Sometimes you are lucky and you can get amazing lens flare like I did in this image of my boys playing in the back field. However, there are other times you have great light in your image but you want to enhance the lens flare look and even add a bit of tint... At the end of the tutorial I have a link to download an action I wrote to go along with this tutorial.It is all about being artistic!
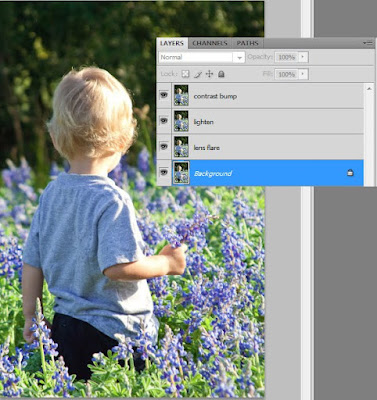
I am going to start with this simple image. The best images are ones that you can see which direction the light is coming from AND has an area of bright sky showing. I used this image to show you that you can add lens flare even when you don't have any light sky or natural lens flare present. You can see the light is coming from the upper right, but no lens flare... So why don't we add a photoshopped version. There are a million ways to do this edit, but I will show you one way I would try.
I made 3 duplicates of my background (Ctrl-J) and labeled them (from the top) Contrast bump, Lighten, and Lens flare.
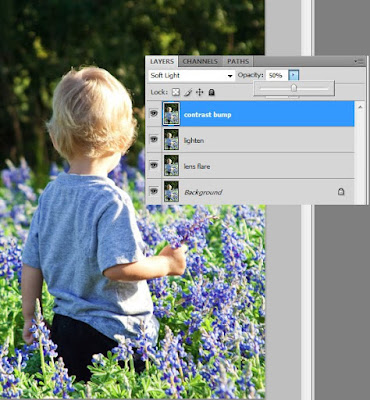
I started with the top layer, Contrast bump, and put that layer in soft light blending mode, 50% opacity. You can also use overlay and/or play with the layer opacity. This is a good starting point, you can always tweak it later.
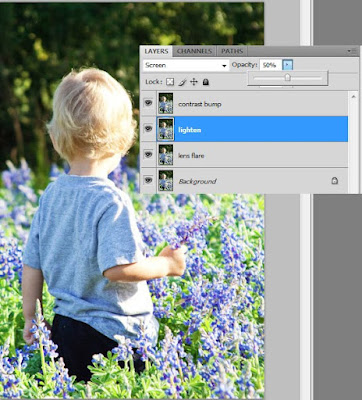
I put the Lighten layer in screen blending mode, 50% opacity. This lightens the midtones.
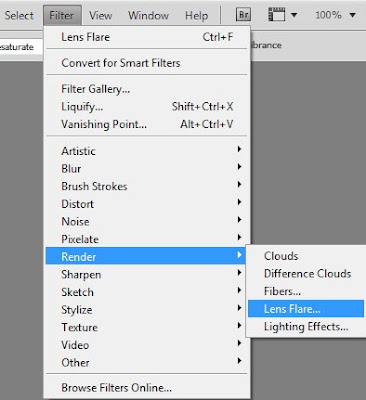
Now I am going to add my sun or lens flare. Click to select your Lens flare layer, and then go to Filter, Render, Lens Flare.
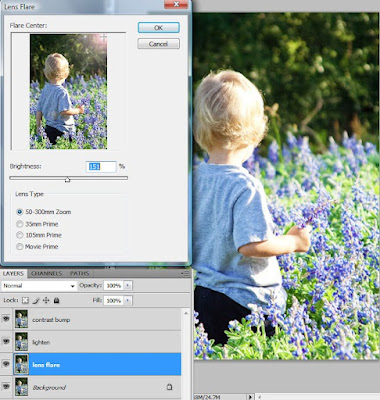
I usually use the top lens type (50-300mm zoom) but I would suggest trying all of them to see what you like best. You also have to physically move the lens flare to location and adjust the brightness to taste. Press OK. This layer I keep in normal blending mode, 100% opacity.
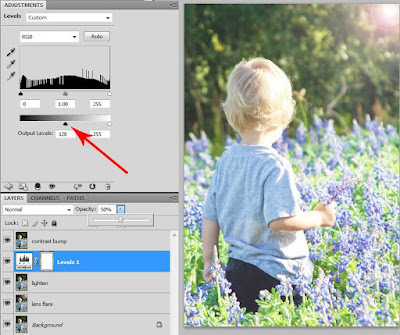
You might want to add in some haze. Simply click on the Lighten layer and then add a Levels adjustment layer. Click on the little black Output levels triangle (red arrow) and move it to the right approx. midway. Keep this layer in Normal and lower the opacity of that haze layer to taste.
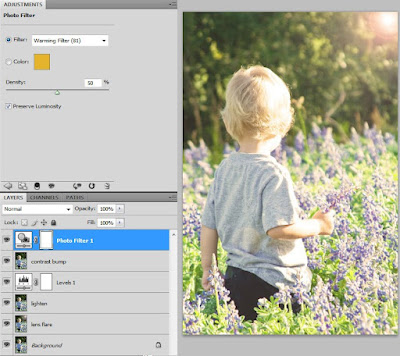
You might want to add a color filter. I want this to look like afternoon sun, so I added a Photo adjustment layer on top and used Warming filter 81 (I also love 85), 50% density, and checked preserve luminosity.
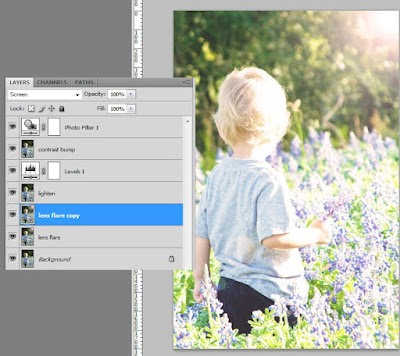
Now you can play with all of the layers to enhance the effect for your individual image. I decided I wanted more lens flare, so I simply clicked on the lens flare layer, duplicated it, and put the copy in screen blending mode, 100% opacity. You can also reduce lens flare by lowering the opacity of the layer.
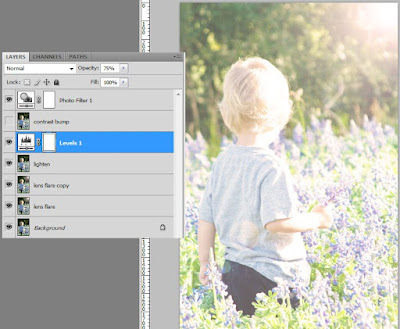
I also decided to add some more haze. I turned off the Contrast bump layer and upped the haze layer (Levels) up to 75% opacity. I like this low-contrast hazy effect.
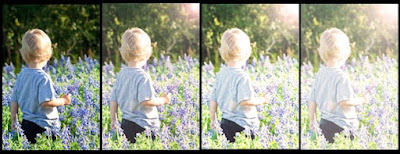
By simply adjusting the layers (blending modes and opacities), you can get so many great looks. Try turning off the lens flare layer and bring up the haze layer opacity. Play with these layers, this action does so much.
I hope you enjoyed learning how to fake your sun/lens flare!
Download the free CoffeeShop Sun Kissed PSE/PS Action!
Want all of my favorite CoffeeShop Actions or Design Elements in one simple download AND help support this blog? Just click here for my action pack or here for a download of some of my most popular design elements, storyboards, and textures. For complete info on installing all of my actions, click here.


