


Note: There is an updated version of this action/tutorial posted here!
It is finally here, the "Underwater Luxe" Photoshop/PSE action! I have been working on this one for some time to perfect it, and I wanted to post it during the warm summer months so those of you in my part of the world can use it right away.
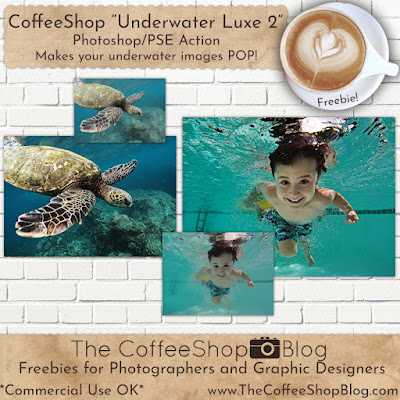
This action is for those low-contrast, blue underwater photos and is especially powerful on portraits. It removes the underwater haze, adds contrast, sharpens, removes blue on skin, warms up skin, and even has an optional skin-smoothing step! This action is completely customizable and should work on most underwater images. I seriously love this action, it is almost magical!
This action, along with hundreds of other CoffeeShop actions, digital designs, textures, papers, and presets can be found in my convenient CoffeeShop Mega Download Pack. Purchase of this pack not only save you time as you get everything in one simple download (including a link to all of my favorite holiday designs), it also supports this site and allows me to keep on posting freebies! I will send you free links to my newest pack up to 2 years after your purchase, and I usually update the pack monthly with new stuff.
CoffeeShop "Underwater Luxe" Photoshop/PSE Action Tutorial:
The two images I used in my ad above and in the tutorials below are both from Clare Gordon Photography (Facebook Page). Clare is based out of New Zealand (she is so fortunate!) and her work is stunning. A good friend, Sam of Bloom Photography (and another incredible photo-artist), sent her my way when Sam found out I was looking for underwater images to test on my new action. I received many great images from talented photographers, but Clare's were perfect for what I had in mind.

But this action is not only for high-resolution professional photographer images, you can also run it on snapshots! This adorable photo below was sent to me by Kaleena. She said it was just a low-resolution snapshot, but I think the action really made it pop.

This is one of those actions that requires a quick tutorial read before running it. It isn't difficult adjusting the settings, but I have many tips and tricks that I wanted to show you so you can get the best edit you can from "Underwater Luxe". The action download link is toward the bottom of this post as I want you to read how to use it before you try running it! If you try running it without reading the instructions you will feel completely lost!
CoffeeShop "Underwater Luxe" Photoshop/PSE Action Tutorial:


Open your image and run "Underwater Luxe".

A "Color Range" adjustment will pop up. This setting smooths skin and is completely optional. You can just press OK if you don't need it. You can also turn this layer off after the action finishes, or adjust the opacity.
To smooth skin, take the eyedropper and click on the skin and adjust the Fuzziness slider until you see most of it is selected. You can add/subtract from the selection by grabbing the little droppers with +/-. Once you are happy with your selection, press OK.

In this case I added more to the skin selection and then removed it from her dress.

Once you press"OK" you will see the Surface Blur adjustment. Adjust the Radius and Threshold to taste to soften skin. It is better to over-soften than under as you can turn down the opacity after the action finishes running. You can also paint this layer off anything that accidentally gets selected.

This is the image after the action finishes, no adjustments.
Now I will go in and play with all of the layers.

I always start with "Luxe" on top. Adjust the opacity to taste. You can also open it up (it is a Levels adjustment layer) and move the sliders under the curve and by Output Levels to get your own custom contrast adjustment.

I like this darker/high contrast effect, but I used a soft low-opacity black brush on the layer mask of "Luxe" to paint some of the darkness off the woman.

Then I moved to the "Remove Blue Tint" layer. This removes a lot of the blue on skin, but also some of the blue from the water. This is fine in most cases, but you can paint this effect off the water to really make the water "pop".
You can fill the layer mask with black and then use a soft white brush to remove the blue from skin. But I like using the Quick Selection tool (by the Magic Wand) to quickly select the model. You can use your favorite selection method.

Once she was selected I reversed the selection.

And clicked on the layer mask and "filled" it with black. As you can see, the blue is removed from the girl but not from the rest of the image. Now the blue is quite stunning.

Adjust the "Smooth Skin" layer's opacity or turn it off. Then turn on the optional "Define" layers if needed. These layers can make your water look sparkly!

As a final step I turn on the "Add Warmth to Skin" layer and adjust it to a very low opacity and painted on the layer mask where needed to mask it. Her legs were too red so I removed some of that layer with a soft black brush.
Here is another image I edited.


This original images was much higher contrast and darker than the previous one, so after the action finished it was very dark and moody. Actually, this is quite stunning and I considered keeping it this way, but I wanted to show you how to brighten it.

I dialed down the "Luxe" layer until I was happy with the effect. I could have also opened that layer and adjusted the sliders, but I didn't find it necessary this time.

I turned on "Add Warmth to Skin" and adjusted it to 23%. Her hair is quite red.

So I grabbed a soft low opacity black brush, clicked on that layer mask, and brushed it from her hair.
Much better!

I also wanted to add some blue tint back to the water, so I clicked on "Remove Blue Tint" and used a 50% opacity soft black brush and painted that layer off the water. Now this image really pops!
I hope you enjoy this action and tutorial! If you have any questions feel free to leave a comment here or on my Facebook page. Please post your own "before and after" images using this action on my Facebook page, I would love to see them! If I love it I might ask you if I can post it here on my blog!!!
Just click here for my CoffeeShop Mega Download Pack!


