


This has probably been the most requested tutorial, and I have finally done it!

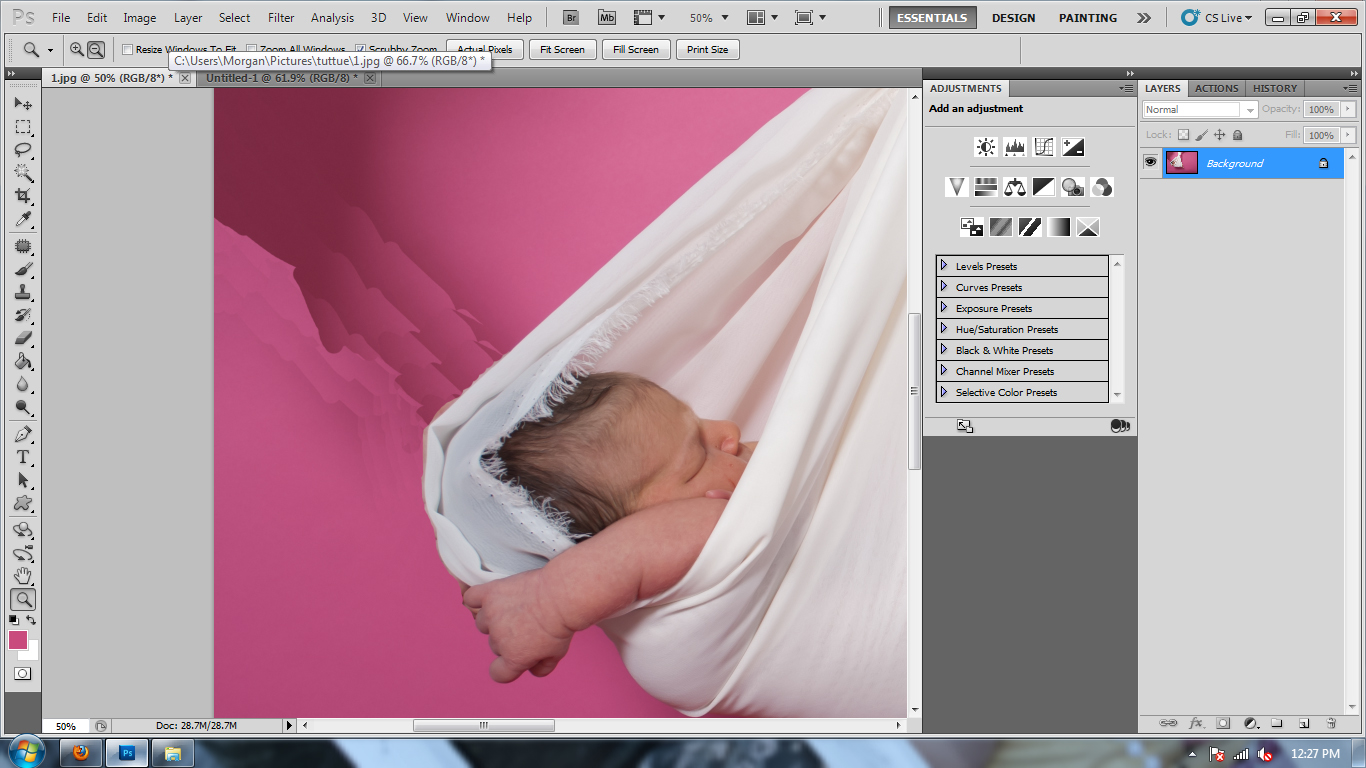
First we start with an image that needs quite a bit of cloning, spot healing and patch tool work.

You can see that to the right we have Jacky :) safely holding the sling just a few inches above the bean bag. What we can do here is use the rectangular marquee tool to remove her from the image.

We select an area that we want to stretch and cover what we want to remove.

Then you ctrl+j to duplicate just the selected area, then ctrl+t to free transform the area.


Stretch it over and down to cover what you want to remove.
Then you notice that the bean bag also has to go. Again use your rectangular marquee tool to select the area to the side of the bean bag to be stretched and cover it up.

Ctrl+j and ctrl+t again to stretch the selection.

At this point I flatten my image.
Next you want to select your patch tool in CS, or your spot healing tool for PSE

I use the patch tool (because I am totally in love with it, and it is by far my favorite PS tool). You can use the spot healing tool to do the same thing, it just takes more time. You want to go over the hard line that came from stretching the "background" since you can see the color difference you want to blend it. The spot healing tool will select the surrounding areas and sample to reach a medium color. It will take more time to do this but it can be done.
For the patch tool just select the area you do NOT want and then drag it to an area of similar texture.

Once blended it should look like this:

Next we want to get rid of Mom's hand that is supporting the baby's head.
We zoom in VERY closely.

Now we get out the handy dandy clone stamp!

I put it on a hard stamp, about 38 because this is just the rough first go.

I sample from a nearby area and clone away...it doesn't have to be perfect yet.

I clone to reach the middle of the area. So I cloned under her arm to reach the middle, then from above her arm to reach the mid point. Again it doesn't look pretty and isn't anywhere near perfect.
Now we go back to the spot healing tool/patch tool.

With the patch tool (cause I love it) I select the whole area that is rough and use a pretty area from the right of the image.
Using the spot healing tool you would just select the rough around from the outsides in until it looks more even.

Back to the clone tool to clean it up!
Zoom in EXTREMELY close. You will use a brush about size 9, and you will want this one to be a soft brush so it feathers and blends well next to the subject.

Then get right up next to the subject like so:

It should look like this.

Now we have these shadows that seem to come from nowhere...spooky :}
We don't want them
So I get out my brush, put it to a rather large size and select an area close the color I want to replace.

I start with the sling's shadow. I select a pink from just under the shadow.
Then I want to cover Mom's shadow, by selecting a pink from just beside her shadow and color over that shadow as well.
Now it looks funky.....

So we get out our tools again :)
Use the patch and spot healing tools to blend the hard edges from painting and voila!

Before and After


Website
Blog
Flickr


