

Pages are great for when you want to link information like "About Me", "Tutorials", "Prices", "Favorite Links", etc. on your menubar. Previously you would have to make a post and backdate it so it wouldn't show up on your front page. It is easy, but then you have a date on top of your "page", unless you remove all dates from your post. People will wonder why you wrote your "About Me" in 2000. :-)
Well, Blogger now has Pages!!! Yes, I was so excited when I suddenly realized that there was a new tab in my Blogger menu called "Edit Pages". And I am going to show you how to add Pages to your blog, and link them through a menubar. If you don't have a menubar yet, please go read my post Adding a Top Button Menubar. Not only does that tutorial show you how to add buttons as a menubar on your blog, but I included some free buttons!
We are going to pretend you made an "About Me" button and now need to make an "About Me" page to link on it.

Got to your Blogger menu and click on "Posting", "Edit Pages".

All of your Pages will be on this page (you can have up to 10). To add a new one, simply click on "New Page".

You will now have a post editing box which you fill out like any other post. In this case you will write a bio about yourself and perhaps add a few good hair day photos. You can click on "Post Options" to allow comments if you want them on your page. Then "Publish Page".

Blogger will ask you how you would like the Pages Gadget to appear. You can have your "About Me" as a side gadget or just under your header (great if you want a little information about your self on top of your blog on every page). But I am going to select "No gadget" because I want to link this page on my menubar and not have it on the front of my blog. Especially since I usually don't have a good hair day. Press "Save and Publish".

Now you need to grab the URL so you can copy it in your "About Me" menubutton code. Click on "View Page".
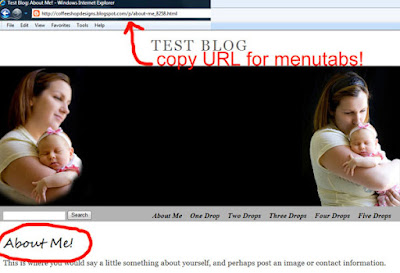
Here is your "About Me" page, and notice it has no date! Copy the URL and paste that where you put the links as seen below.
 Now when you click on your "About Me" button you will be directed to your "About Me" page. How easy is that?
If you want to edit your Page or make a new Page, go back to "Edit Pages". All of your pages will be listed and you can view, edit or delete them there.
I hope this has encouraged you to love your Blogger blog even more! You can also use this method on menubars that are not buttons. My next Blogger tutorial will teach you how to link labels on your nifty menubar.
If you have any questions, please post them them in my CoffeeShop Flickr Group!


