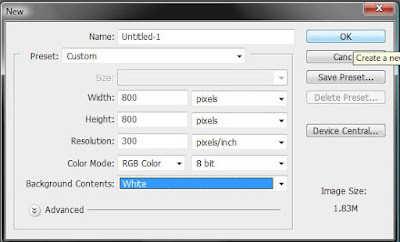
For this example I am making a web storyboard, but you can make any size storyboard you want. If you are going to print it, make sure it is 300dpi.
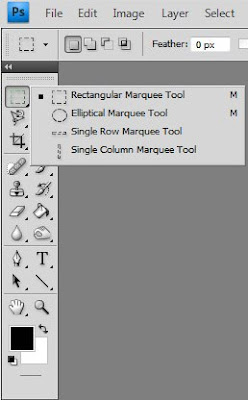
Every storyboard needs cutouts. I use clipping masks to make mine. For my first one, I will make a rectangular cutout using my rectangular marquee tool.
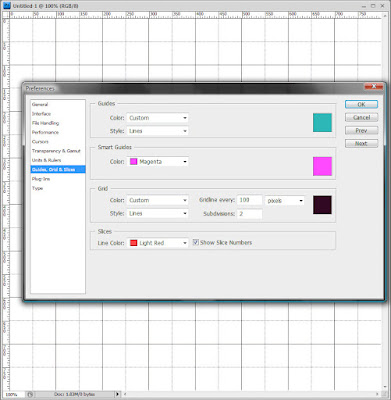
I want to see a grid for image placement, so I went View, Show, Grid. If you want to change the settings for your grid, go to Edit, Preferences, Guides Grid Slices and adjust them there.
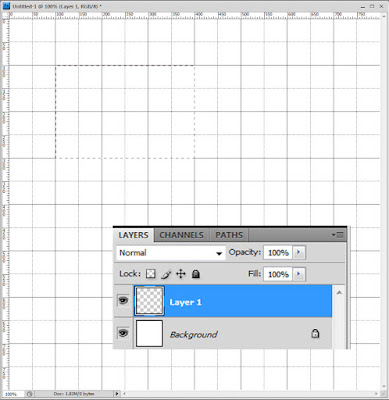
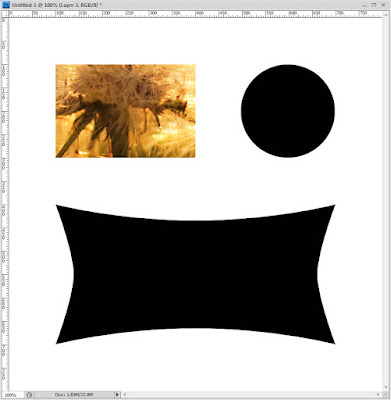
I made a new blank layer (I clicked on the "create a new layer" icon on my layer pane) and drew a rectangle with my marquee tool. Don't worry too much about the size or placement, this can all be easily adjusted later.
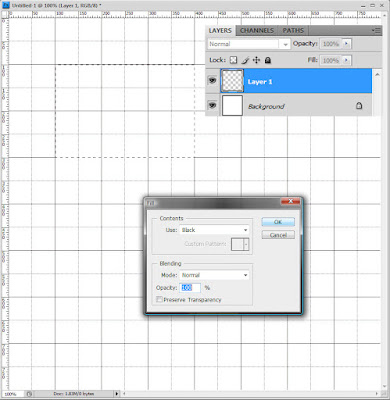
Now you must fill this selection with a color. Any color will work, but I will Edit, Fill with black.
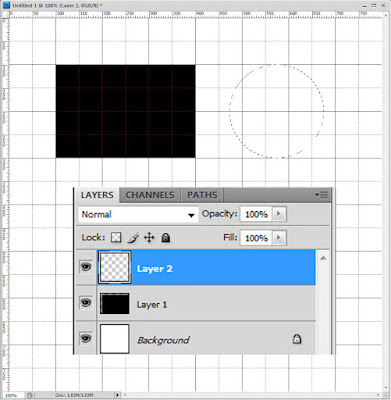
I made a second new layer and selected the the elliptical marquee tool and drew a circle. Again, size and placement are not critical, you can change this later.
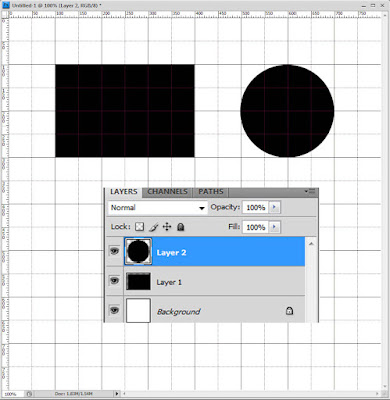
Edit, Fill with black. I also selected the move tool (V) and moved it to the right a bit. You can also free transform it (Ctrl-T) and adjust the size and placement. You can adjust this later if you want.
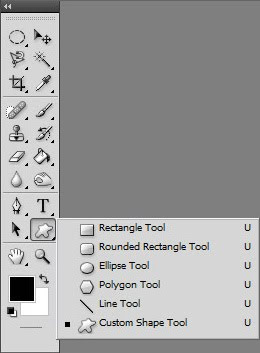
Perhaps you want a fancy shape cutout. Click on the shape tool in your toolbox and select one of the shapes listed (I love the rounded rectangle tool) or click on the custom shape tool as I did in this tutorial.
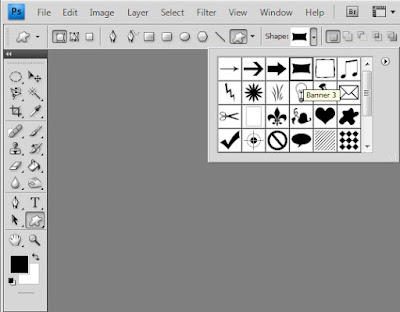
Find your favorite shape in the list in the top drop-down menu. You can also find free shapes on the Internet. Or you can take your paintbrush and paint your own custom shape right on a new layer, the sky is the limit! I picked the cool boxy thingy (banner 3).
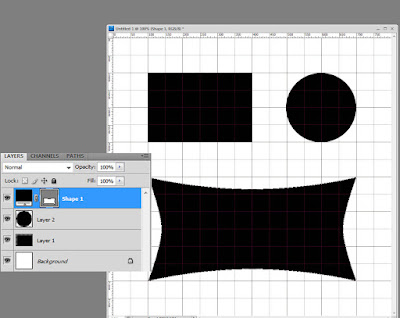
Here is my shape on my storyboard. You don't have to make a new layer, the shape tool automatically does this. Now I want to get rid of the grid marks (they are distracting) so I went to View, Show and unchecked Grid. Save this blank storyboard as a .psd so you can use it over and over. And now add your images.
Loading Images Via Clipping Masks!!!
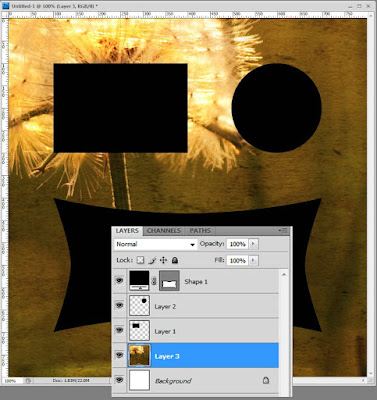
Open your first image and drag it (use the move tool, V) on top of your storyboard. In this case it fell just above the background. You can leave it here if you want an image background, but for this tutorial I wanted it in a cutout. I moved it just above layer 1, the rectangle and then grouped it with that layer. Please read my Clipping Mask Tutorial for more details on grouping.
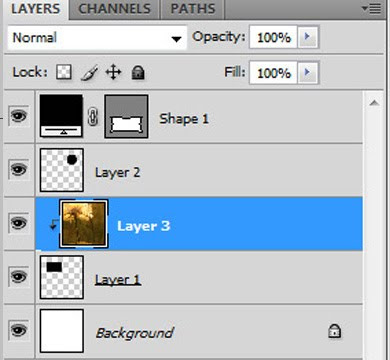
Now the image is grouped with my rectangle clipping mask as seen just just above and below.
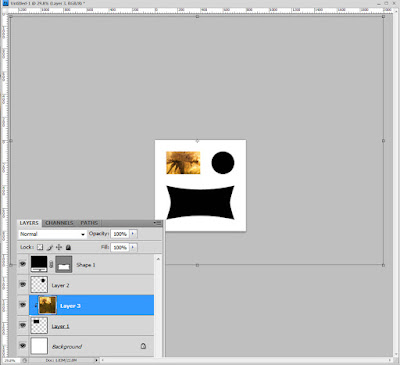
To move it around and resize your image, just free transform (Ctrl-T, Ctrl-0, zero, if you can't see the bars) and adjust the shape and placement. Make sure that constrain proportions is checked in Photoshop Elements or that you hold the shift key in Photoshop so your image will not become warped. After you adjust your image size simply Ctrl-0 again if you want to make your storyboard fill the screen.
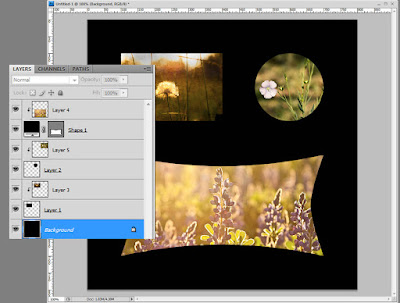
Continue to add your images this way, drag and drop them on your storyboard, drag them just above your clipping mask, group them and adjust by free transforming. After adding your images you can change the color of the background by selecting the background and Edit, Fill with a color or dragging another image just above the background layer.
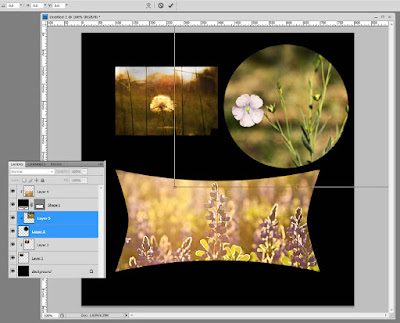
Say you want to adjust the size or placement of one of your images. This is so easy. Click to select the image and its clipping mask layer at the same time, Ctrl-T and adjust the size and move it around to taste. Then flatten and save.
I hope this tutorial helps you make your own storyboards. And yes, this storyboard is supposed to resemble a Halloween pumpkin! I am already in the spirit after seeing all of the pumpkins in the stores this dreary fall weekend. :-)
If you have any questions or need additional advice, please post your questions over at the CoffeeShop Flickr Group!


