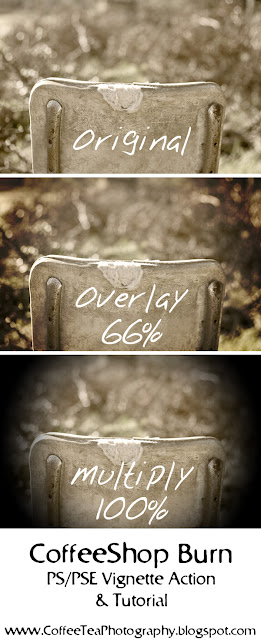
I have already written the CoffeeShop Vignette action and tutorial, but I discovered another way to make a vignette and it is so easy! One is not better than the other, but I usually use CoffeeShop Burn because it is fast. If you want to download the Photoshop/Photoshop Elements action made from this tutorial, you can find the download link at the bottom of this post.
Start with a flattened image. Press D to set your default black foreground and white background color pallet. Add an Gradient adjustment layer (not to be confused with a Gradient Map).
Change the Style to Radial, Scale to 150%, and make sure Reverse is checked. Then click on the Gradient to make additional changes.
Move the upper right Opacity Stop to the middle (the Location should read 50%). This can be adjusted to taste. The lower the percentage, the smaller the vignette.
The final step is to put the blending mode to a setting which appeals to you. This is Overlay blending mode, 50% opacity. I also love using multiply, soft light, vivid light, and even hard light in different images. This is something that has to be decided with each individual image.
Download the CoffeeShop Burn PS/PSE Action HERE!
Do you want to download thousands of professional CoffeeShop PSE/Photoshop actions (including exclusive ones not found anywhere for free), textures/overlays, scrapbooking papers, clip art/design elements, photo storyboards and frames, and Lightroom presets from this site in one convenient zipped file AND help support this one-woman blog?
Just click here for my CoffeeShop Mega Download Pack!


