


I love adding artistic light effects to my images and I wanted to show you one technique I use to create my custom "Confetti" overlays. I have already posted a "Confetti Lights" action that automatically creates three of my favorite Confetti Lights overlays on your image, but I wanted to show you how I create them so you can make your own custom light overlays.
I am posting a step-by-step tutorial below and I also created a set of three "Confetti Lights" overlays that you can download at the bottom of this post. And if you subscribe to Jill Wellington's and my free CoffeeShop Newsletter (sign-up on the side of this post) you will receive a pack of additional free custom Confetti overlays first thing Monday morning and a fun new tutorial on how I use them.
The other day I was playing around on the computer trying to figure out how to add colored light effects in Photoshop and PSE and I came upon this really easy method that I haven't seen anywhere else. I hope you enjoy this tutorial on how to create your own overlays.
CoffeeShop "Confetti Lights" Overlay Tutorial for Photoshop and PSE:

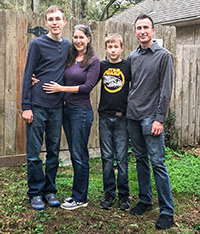
Open your image. I used a beautiful portrait from Jill. Add a new layer above the image.

Select the colors you want to use for your Confetti Lights overlay by clicking on your foreground and background colors. I used blue (I selected her hat color and made it a bit darker) and black. It doesn't matter which is foreground and which is background.
Then go to Filter, Render, Clouds.

This is what the overlay looks like.

Put this layer in Screen, Soft Light, or Overlay blending mode. I used Screen here.

Add a layer mask and use a soft black brush to paint the Confetti Lights layer off skin, hair and clothing. Then adjust then opacity to taste.
The black areas on your overlay won't affect your image in Screen blending mode, only the blue lights will be obvious.

In this image I used Soft Light blending mode for more contrast. This is subtle but really pretty.
You can see that the black areas on your overlay darken the image in Soft Light Mode.

You can also use white or gray as your neutral color. I created this overlay with blue and white.

This is Screen blending mode and you can see that the white area of the overlay really lightens everything. This can create a beautiful fantasy effect.

If you use Soft Light the contrast is not affected by the white area and you only see the blue lights.
Now I am going to show you two ways to combine the overlays to get a multi-colored confetti effect!
Confetti Lights Using Several Overlays:
First Method:

You can add as many of these cloud overlays as you want and you can use two vivid colors rather than a color and a neutral like black or white. In this sample I made two new layers. I added a green and blue cloud filter to the top one and pink and purple to the bottom one.

I put both of these layers in Screen blending mode and put the top one at 76% and the bottom one at 66% and masked out the young woman in both. You can completely customize this effect and go as dramatic or subtle as you wish.
Second Method:

You can go all out and create a beautiful custom overlay and even save it as a jpg texture to apply on any of your images. This method is really helpful as you can see how each color layer affects your image and you can turn on/off layers until you have your perfect Confetti Lights.
Open your image and add a new blank layer. Click on the color picker and make your foreground dark purple and your background black. Then go to Filter, Render, Clouds.

This is what it looks like.

Put this layer in Screen blending mode.

Make a new layer on top and change your foreground color dark blue and leave the background black and run the Cloud filter again.

Put this layer in Screen blending mode. Now you see the combined light overlays. This is lovely but I am going to add one more color.

Keep on adding these layers until you love the effect. I added one additional overlay. Make a new layer and change your foreground color to gold and leave your background black and apply the Cloud filter.

Put this final layer in Screen blending mode. I love this one! Now we will group them together so we can add a layer mask and remove the lights overlay from the beautiful young woman.

Photoshop Users: Select all three layers and group them.
PSE Users: Select all three layers (click on the top, hold shift, then click on the bottom one) and right click and select "Merge Layers".

This is the final overlay. Pretty!!! Because I used black as one of the colors this overlay will look great in Screen mode.
You can actually flatten and save this overlay as a jpg or png to use on other images if you want. But I am going to apply it right now to the image.

Put the Confetti Lights overlay in Screen blending mode, add a layer mask, and paint out the lights on your portrait using a soft black brush at 50-100% opacity. I used 100% on her skin/hair and 50% on her hat.

Try Soft Light blending mode also. This is really pretty as it adds more contrast and less haze and is a bit more subtle.
I hope you enjoy this new tutorial and I would love to see your results on my Facebook page!
Download the free CoffeeShop "Confetti Lights" overlay set. You can also download it here.
Do you want to download my favorite CoffeeShop PSE/Photoshop Actions and Lightroom Presets or Design Elements in one convenient zipped file AND help support this blog? Just click here for my action pack or here for a download of some of my most popular design elements, storyboards, and textures.


I really love the light blue and purple! SO pretty with winter photos. Thanks, Rita!
ReplyDeleteThis is wonderful! Thank you so much! As an amateur photographer attempting to go pro, your actions have made the editing part of my photography so much easier! Thank you so very much!
ReplyDeleteLove, love, love your site. And now you've teamed with Jill! Be still my heart. Too much awesomeness.
ReplyDeleteI would love to see an action for PSE that would blend text down into the paper texture. Blending modes just don't do the trick.
Thank you for my CoffeeShop folder full of goodies.
Appreciate the recommendation. Will try it out.
ReplyDelete