


I have so many actions available now that I often get overwhelmed trying to figure out which one to use on an edit. I am sure you have the same problem, so every week I am going to put up a tutorial using some of my past actions.
Today I am editing this gorgeous portrait using the CoffeeShop "2 Minute Miracle Plus" and "Aphrodite" actions. You can download both free actions on the posts and also find step-by-step instructions on applying them to your image.
I also have a special action/preset download pack where you can get all of my favorite actions/presets in one simple download (hundreds of actions plus some bonus ones not found here on my site!) and help support my blog.

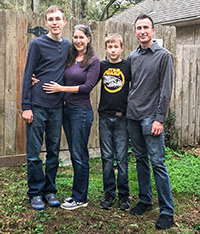
1. This is my starting image. You can download it here (and check out Lisa's other free images).

2. Adjusting Contrast: I started by adding a Levels adjustment layer and lightening the midtowns and highlights by moving their sliders to the left. This caused some hot spots (blown-out areas) on her nose and upper forehead.

I used a soft black low opacity brush and clicked to select the layer mask and painted some of that layer off her nose and forehead.
Then I noticed her eyes and lower left part of her face has some shadows that I want to soften.

3. Soften Shadows: I added a Levels adjustment layer and put it in screen mode. It has completely blown out the image but don't worry.

I clicked on its layer mask and filled it with black. Then I used a soft white low opacity brush and carefully painted over areas where I wanted to remove shadows and improve the overall lighting.

4. 2 Minute Miracle Plus Action: I ran my "2 Miracle Miracle Plus" action. I edited the eyes using Eye Define, Bright Eyes, and White Whites. I was happy with the Smooth Skin layer so I left it alone, and I dialed up Boost to 64%.

5. Aphrodite Action: I finished up my edit by running my "Aphrodite" action. This is one of my absolute favorite actions to run on portraits.

After the action finished I only made one change. I turned on the Contrast Boost layer, brought it up to 80% opacity, and then used a soft black 100% opacity brush and painted over her face. This is a nifty way to burn in the background.

Quite a difference, right? Never be afraid to combine actions. And your own edits can be very subtle or dramatic like the image I edited here. Have fun and create your own photo art!
Do you want to download my favorite CoffeeShop PSE/Photoshop Actions and Lightroom Presets or Design Elements in one convenient zipped file AND help support this blog? Just click here for my action pack or here for a download of some of my most popular design elements, storyboards, and textures.
For complete info on installing all of my actions, click here.
Facebook | Pinterest | Twitter


What a difference! Great tutorial. Thanks Rita. Hope you guys are feeling much better.
ReplyDeleteLisa D.
Thank you Lisa! We are almost 100% now. It feels so good to be well. :-)
Delete