


I love the CoffeeShop Storybook Vintage action. Today I am going to do an edit with this action and also use one of my textures.
CoffeeShop Storybook Vintage Texture Tutorial:

1. I snapped this shot with my iPhone at Huntsville State Park this November on our camping trip. Huntsville is gorgeous and I love this park. I wanted to use this lake scene for my Facebook cover and decided to add a texture.

2. I cropped the image but didn't resize to the 851x315 Facebook cover size. I will do that after the edit.

3. First I added the CoffeeShop Painting Texture 2. These painting textures are some of my favorite textures I have posted on this blog. They can be used on anything. As you can see the texture is larger than the image, but I just moved and typed Ctrl-T to place it where I wanted on the image. I put this in overlay blending mode.

4. I typed Ctrl-J to make a copy of that texture layer and kept it in overlay blending mode.

5. I wanted to add a vintage tint so I flattened the image and ran the CoffeeShop Storybook Vintage action. The only adjustment I made to the action was bring the Vintage Color Tint layer up to 64% from 50%.
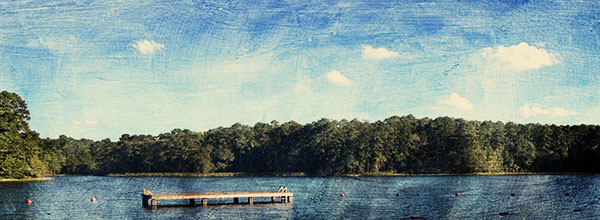
Here is the final edit. I am really pleased with it. Please mouse over to see the before. Both the action and textures are free downloads on my blog, and they are also included in my download sets.
Do you want to download my favorite CoffeeShop Actions or Design Elements in one convenient zipped file AND help support this blog? Just click here for my action pack or here for a download of some of my most popular design elements, storyboards, and textures.
For complete info on installing all of my actions, click here.


LOVE this look! Thanks for sharing!
ReplyDelete